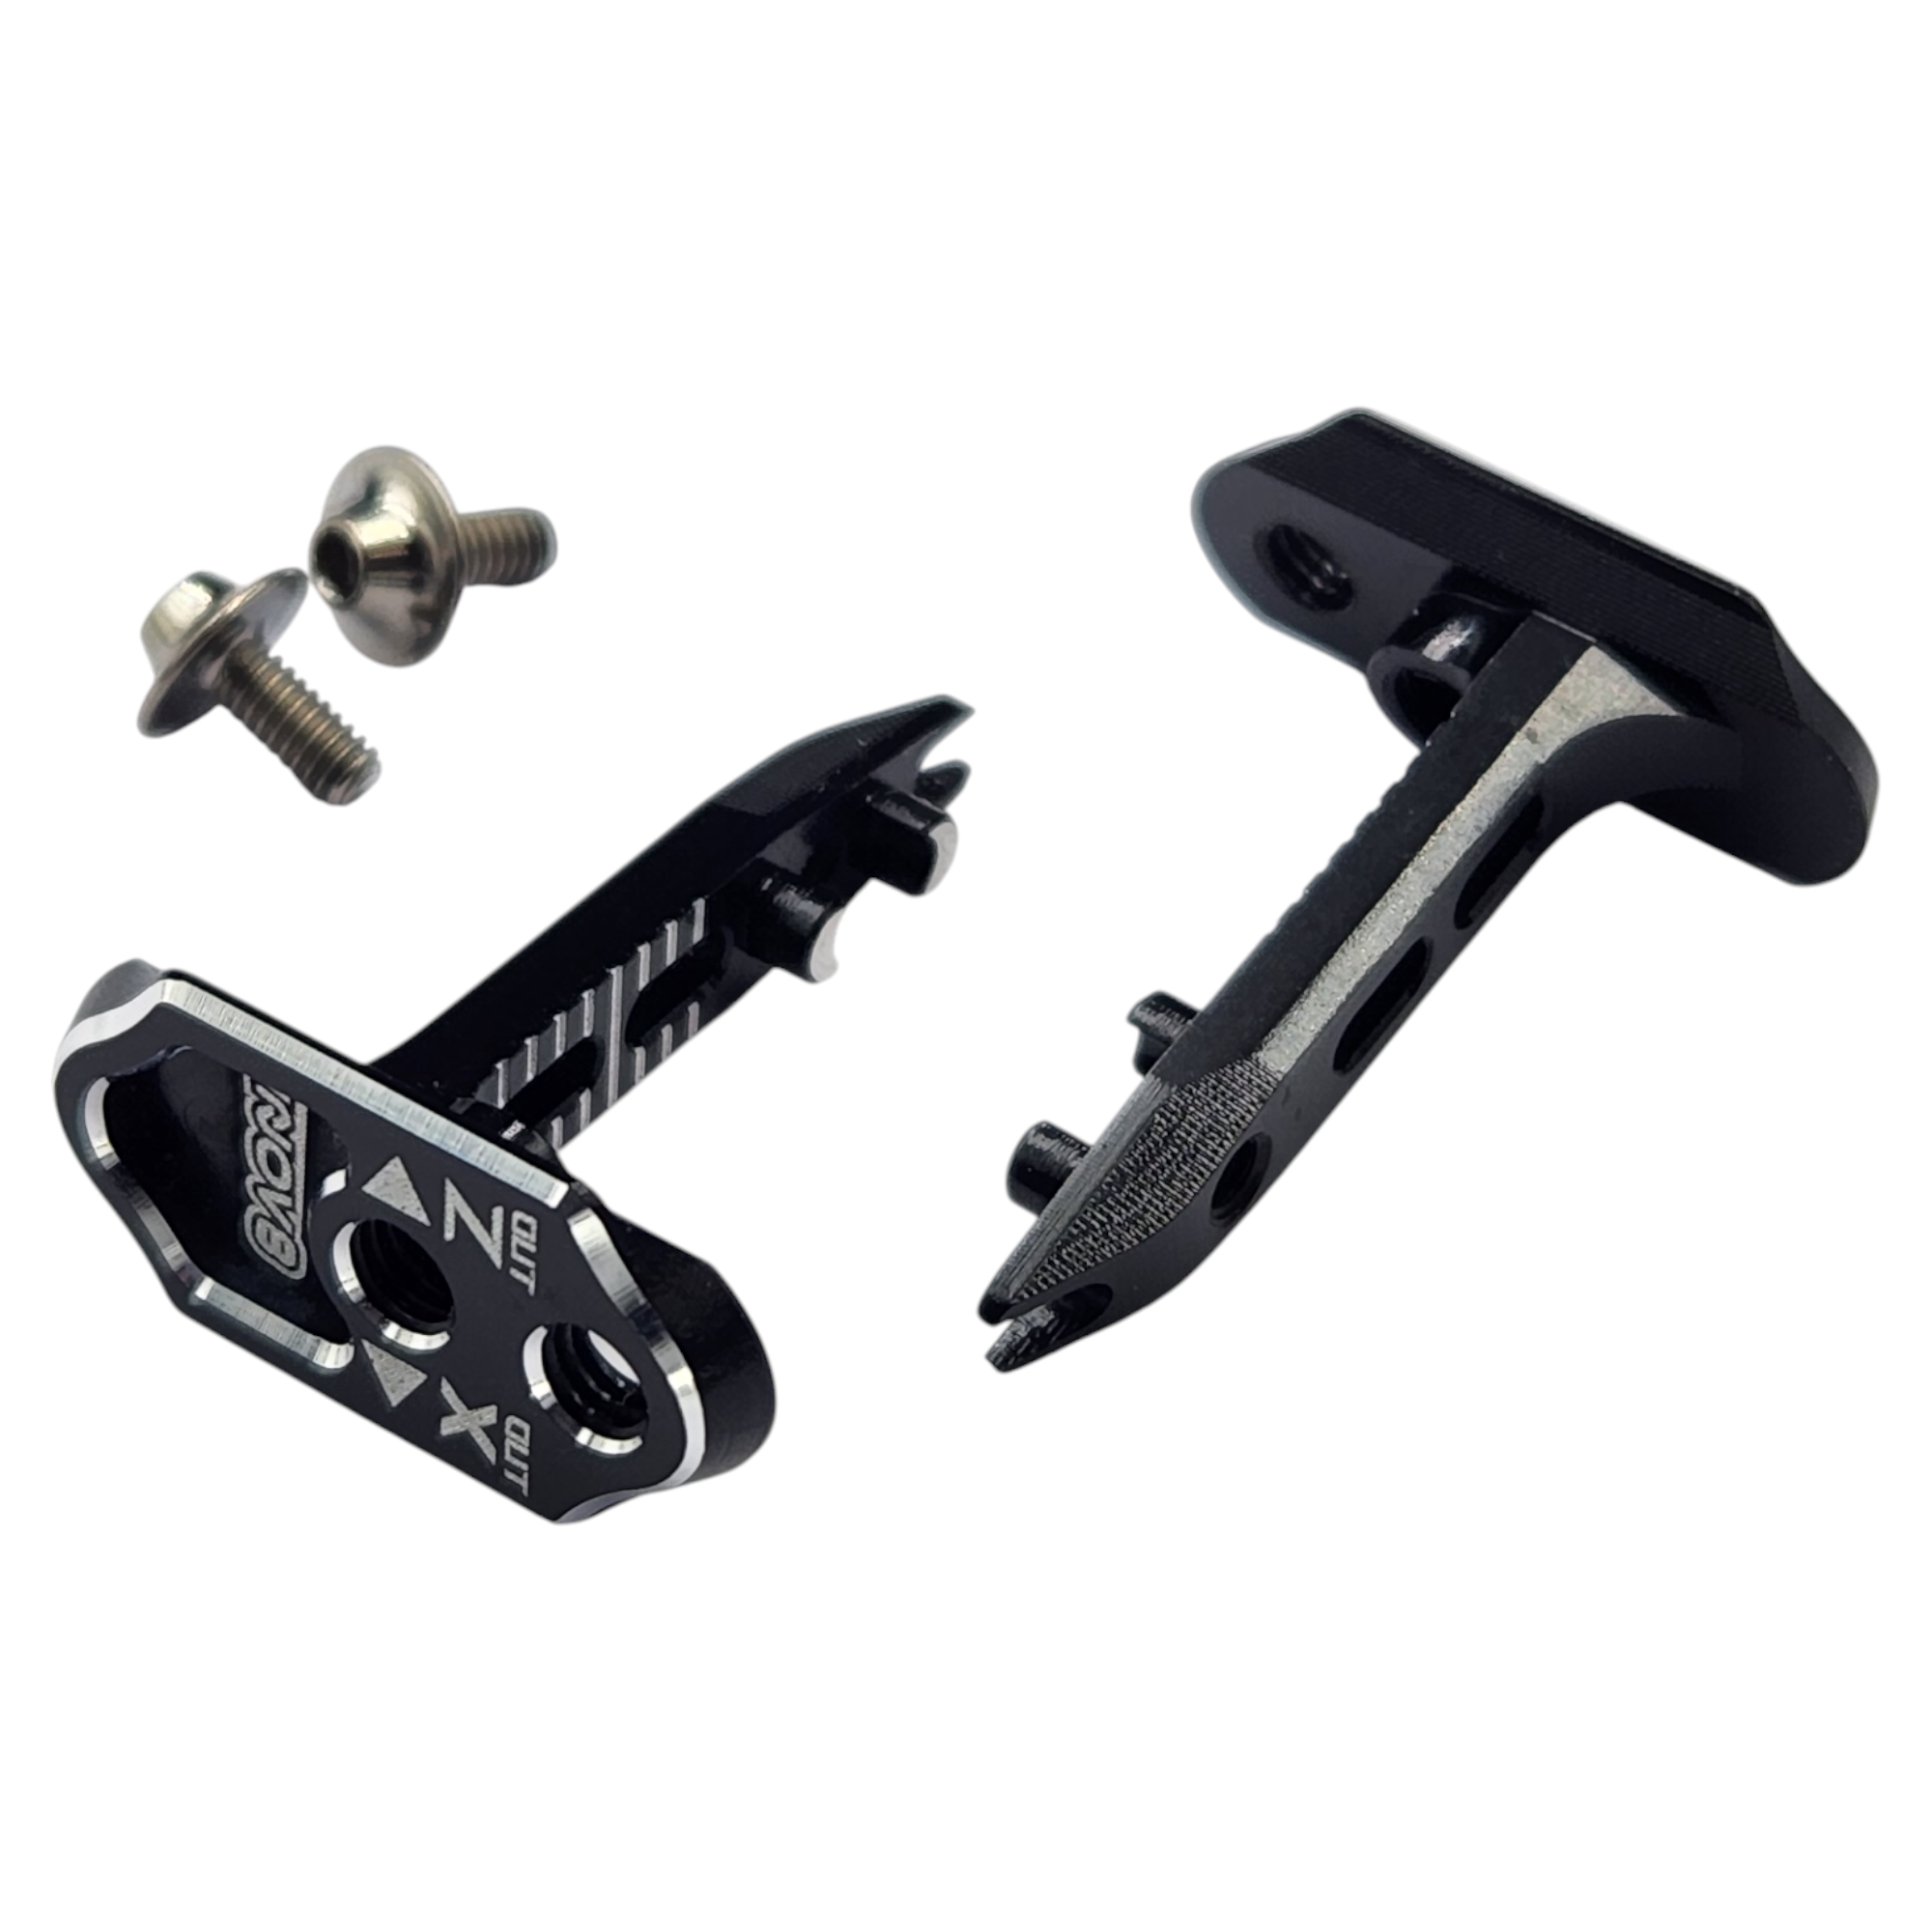
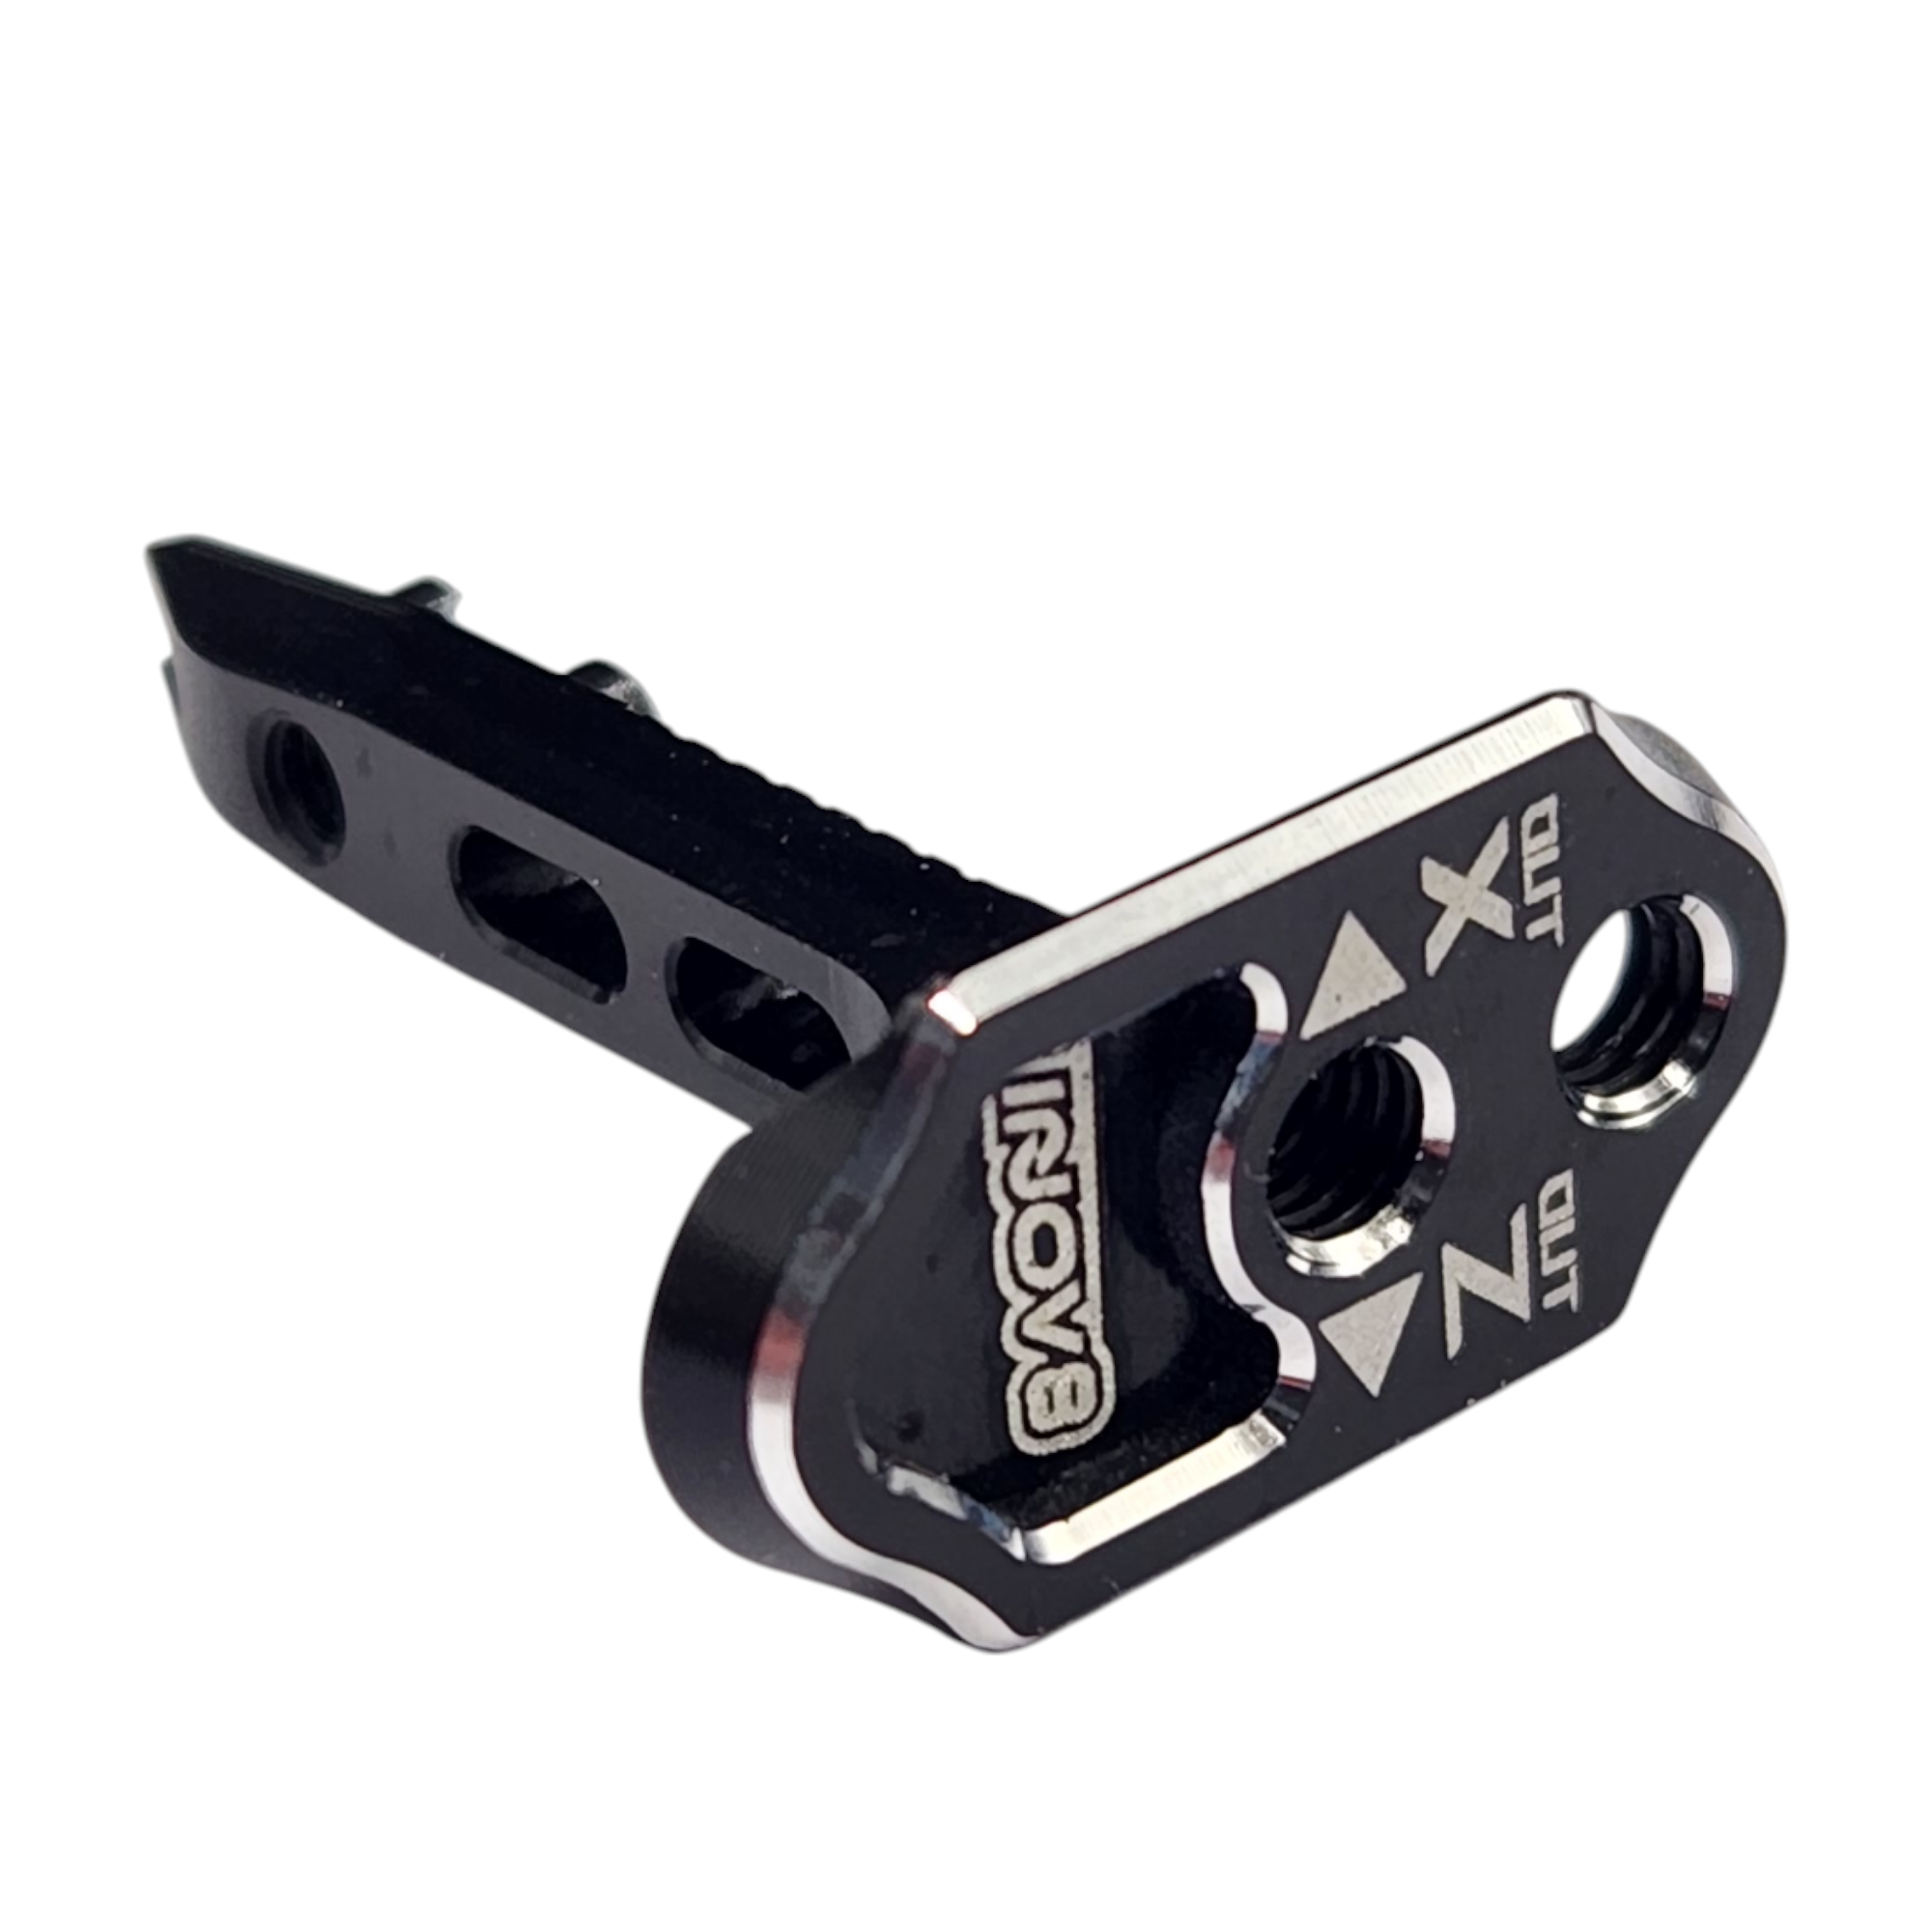
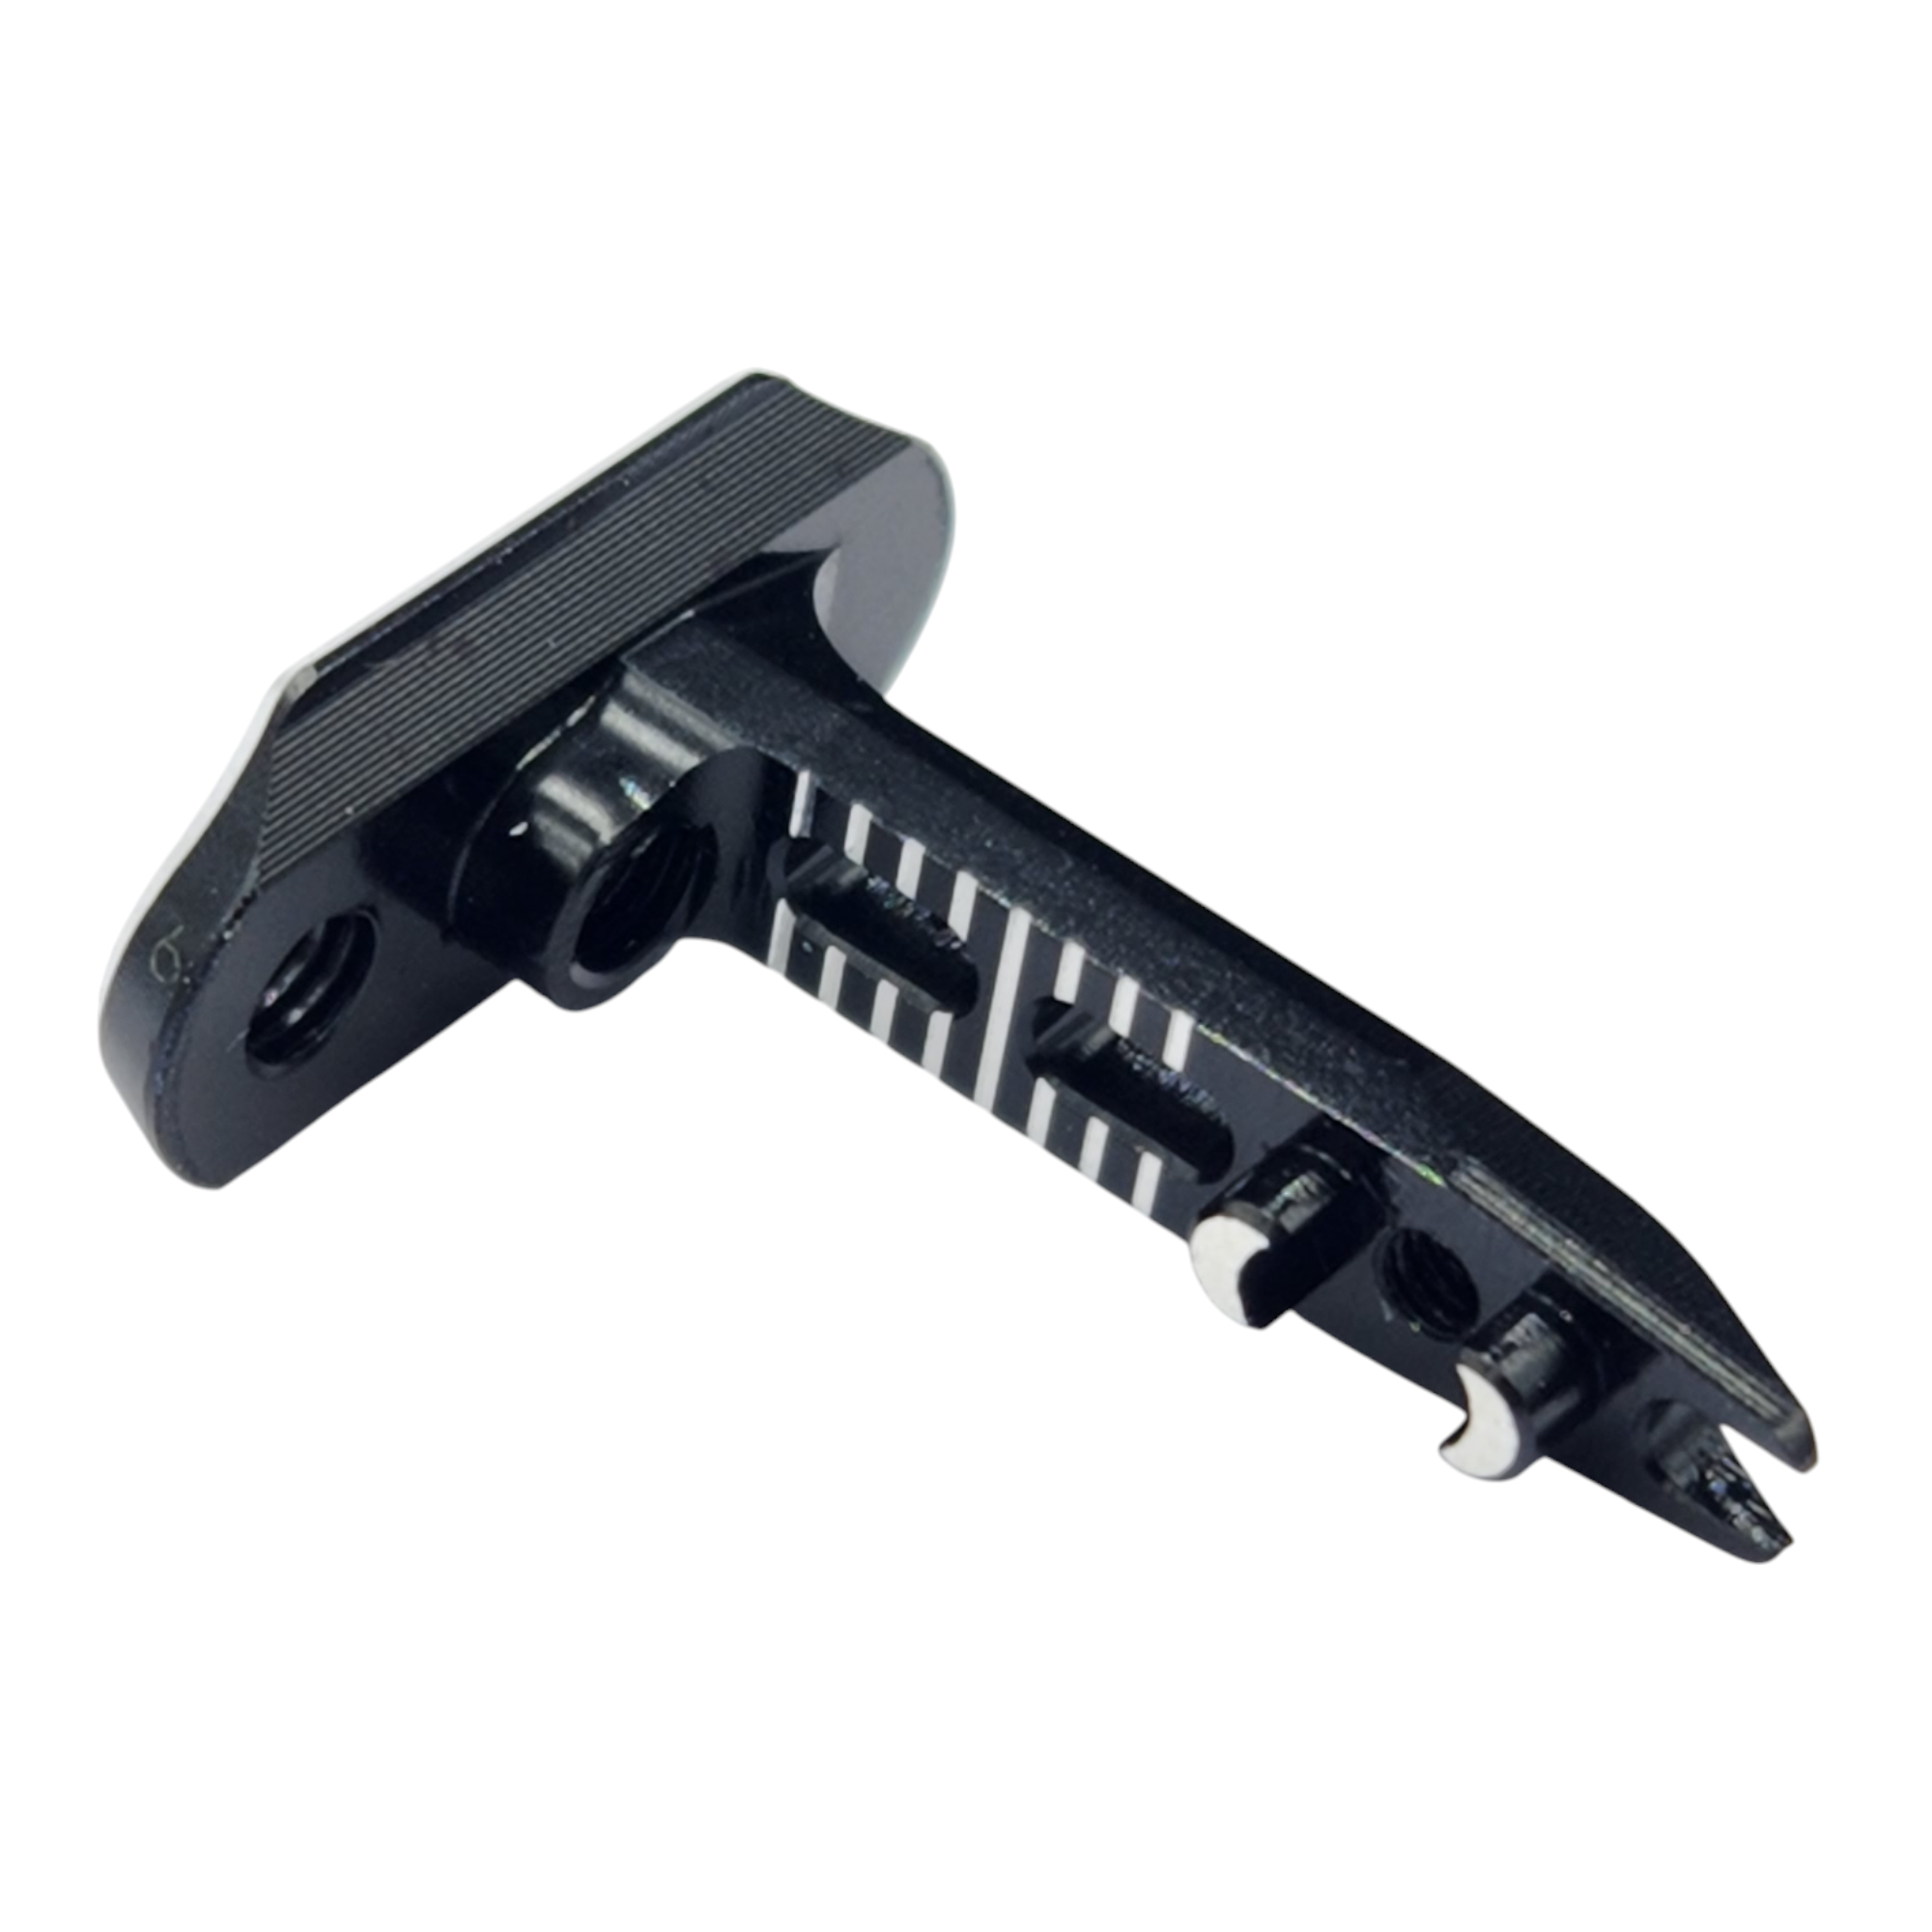
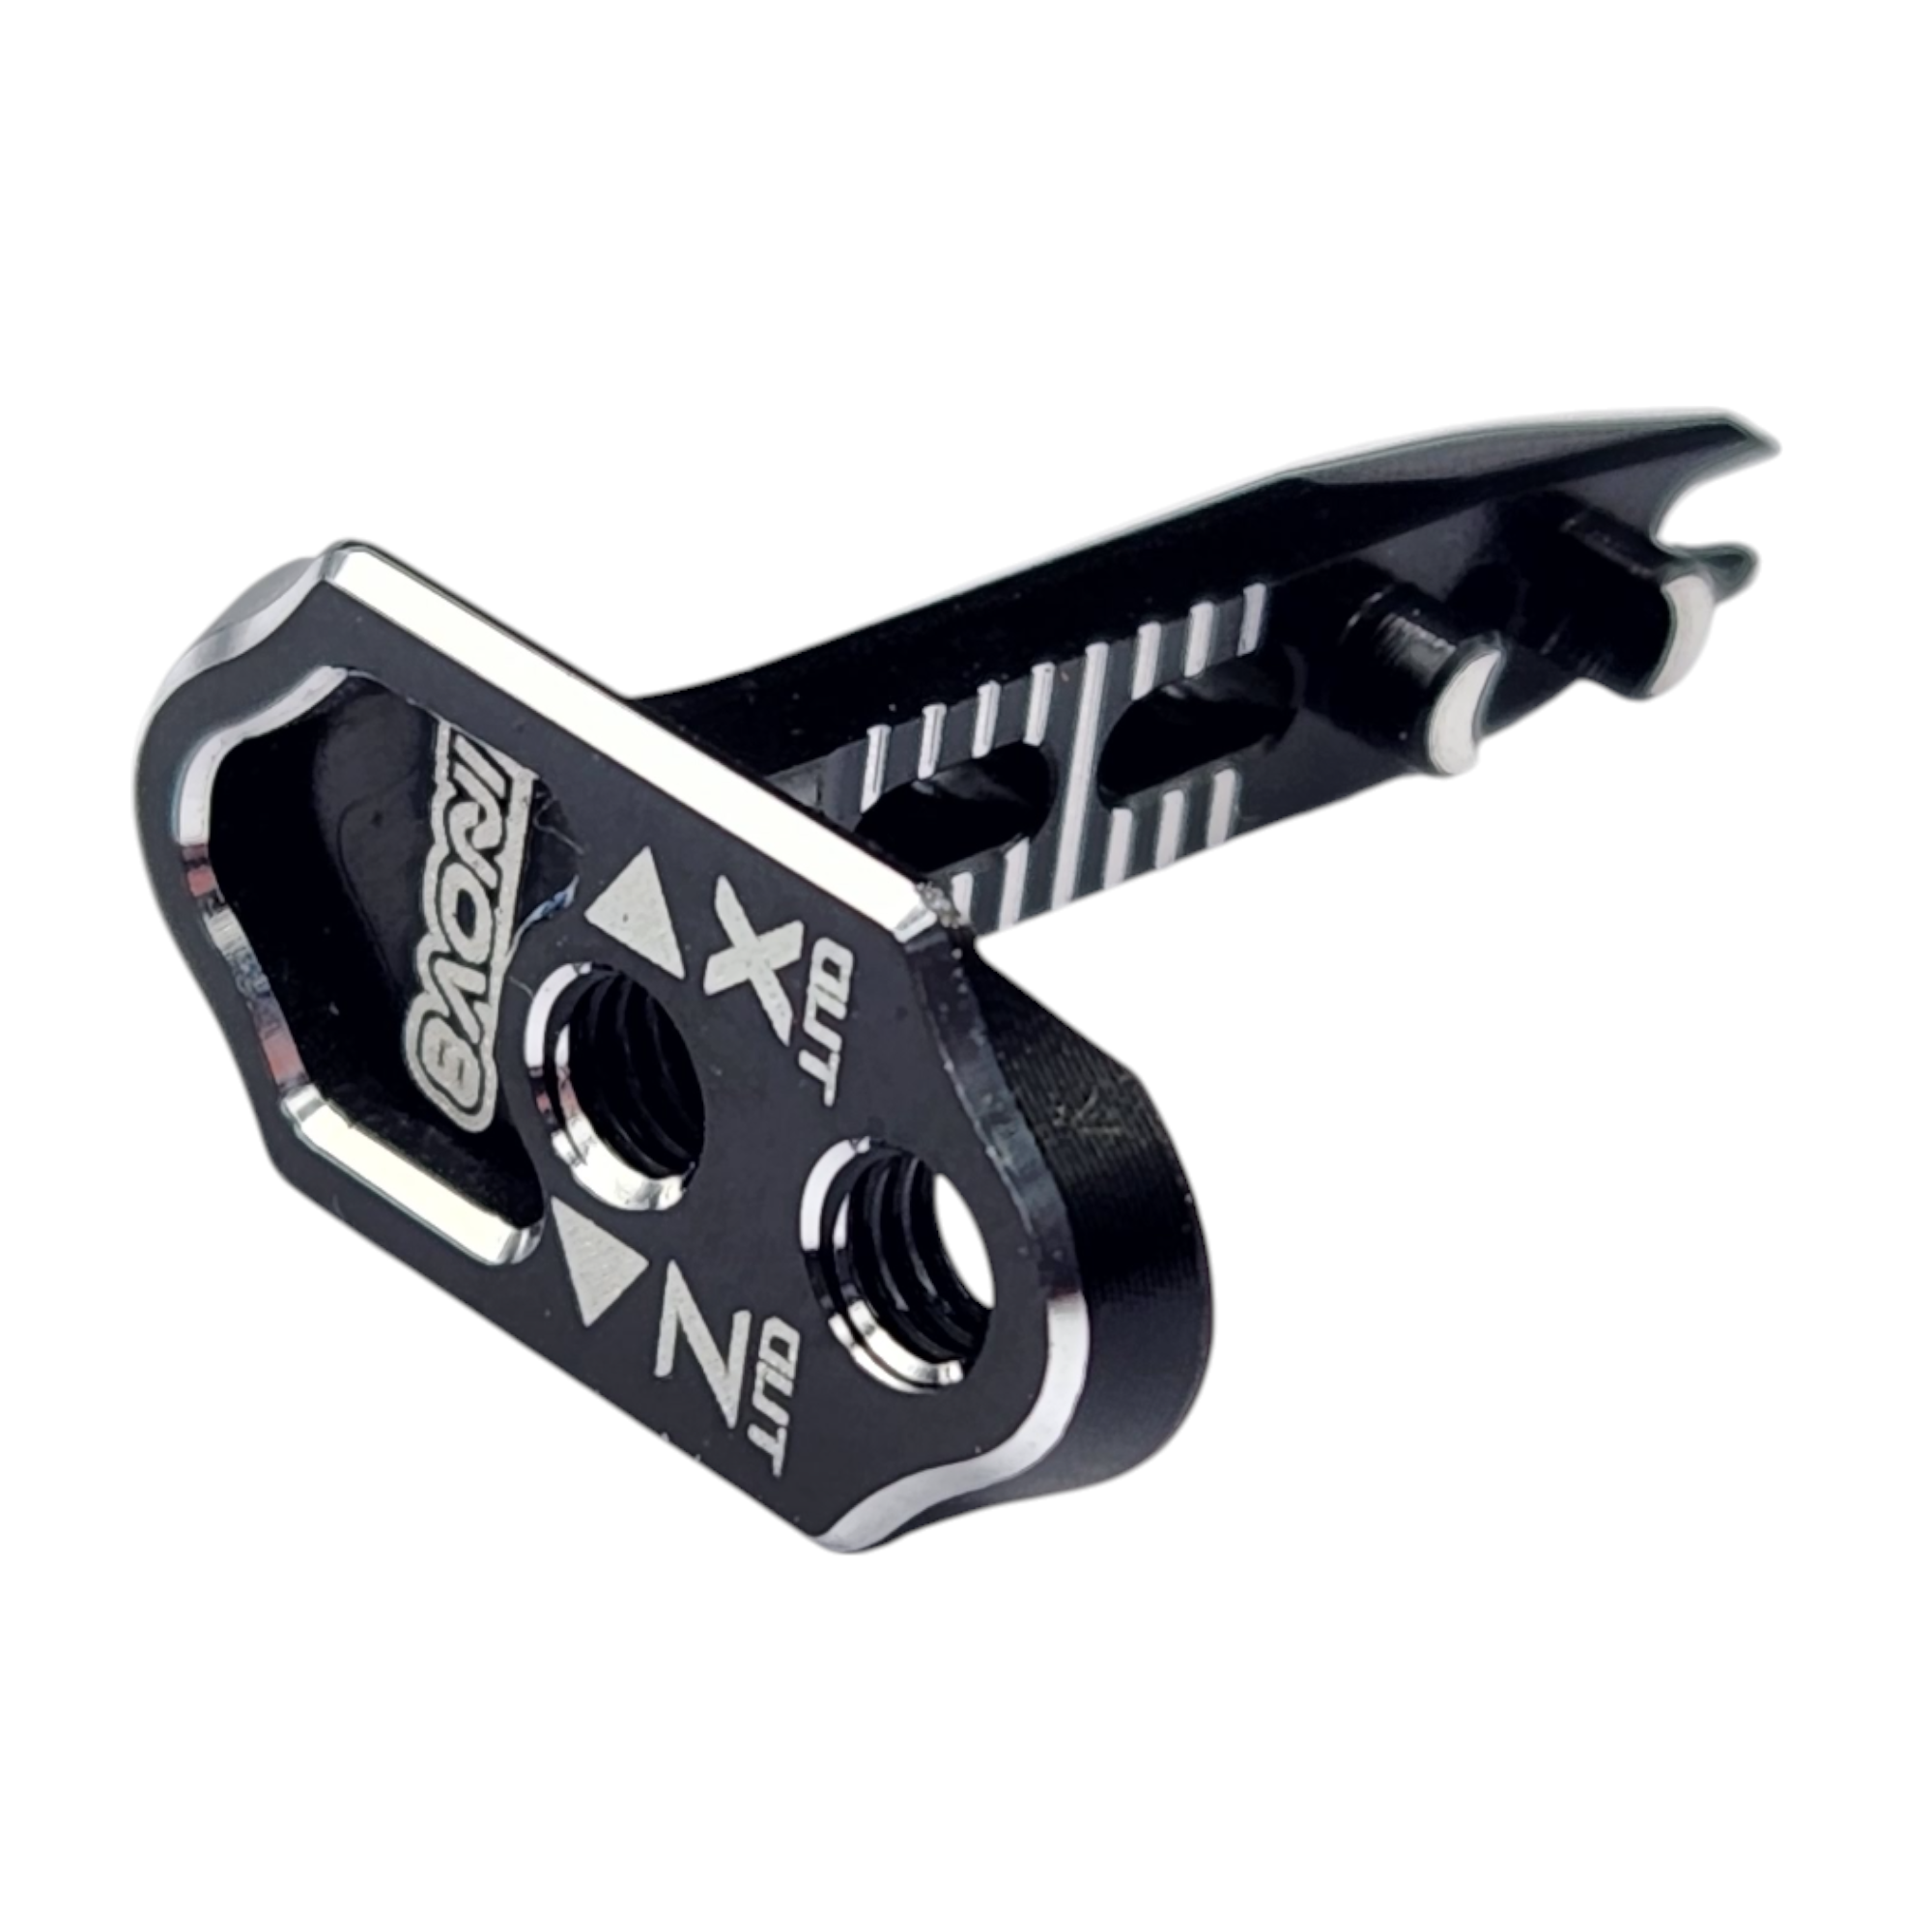
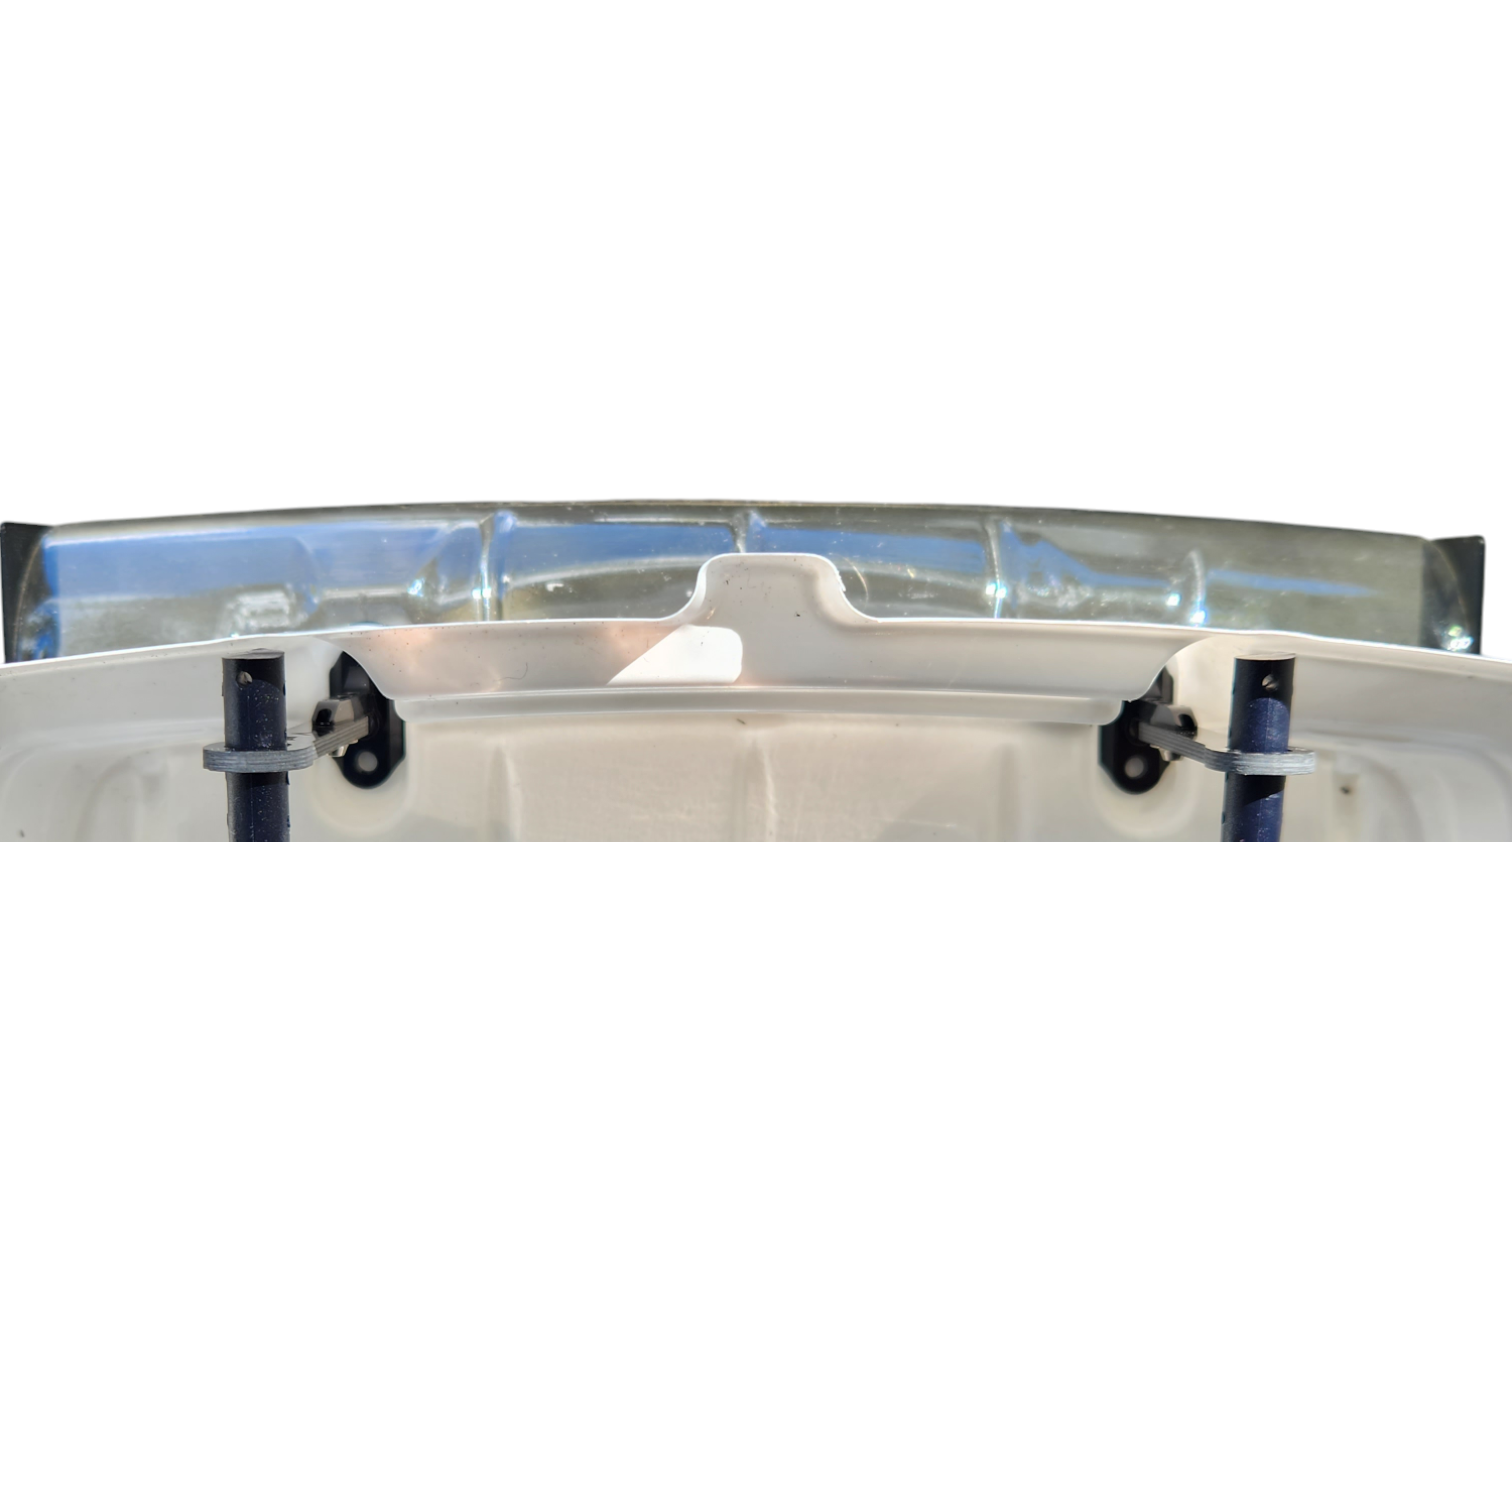
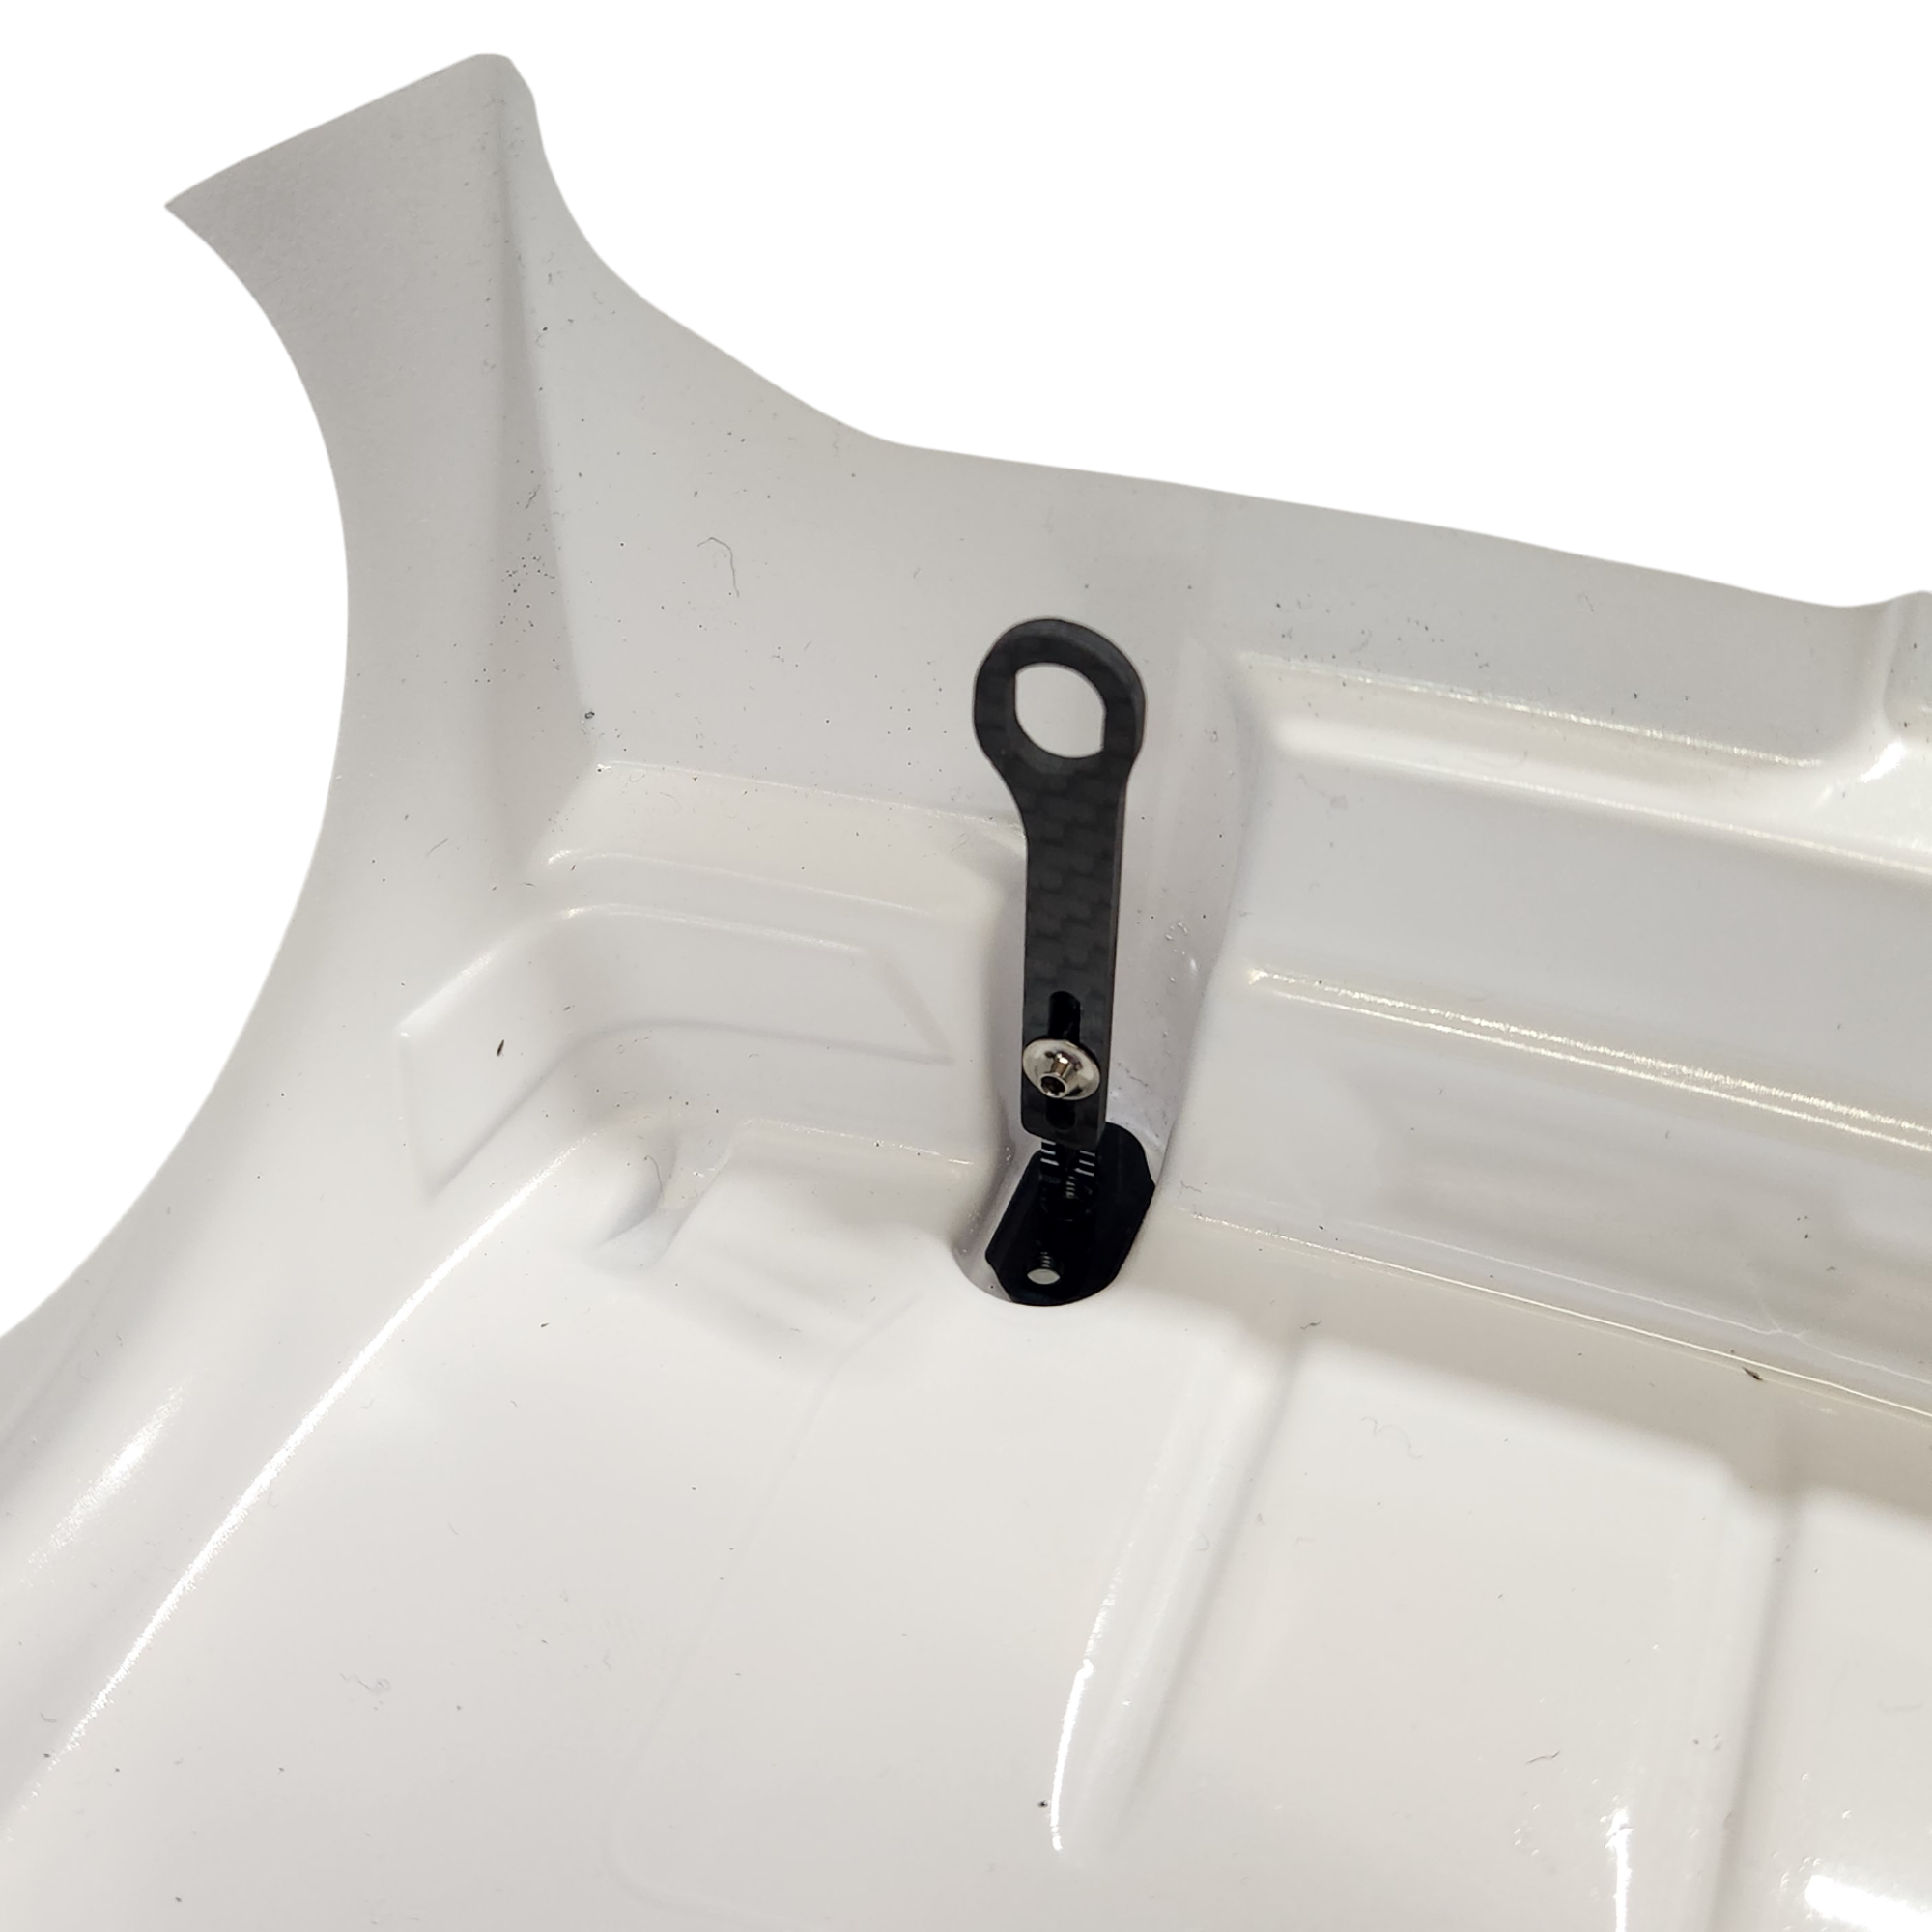
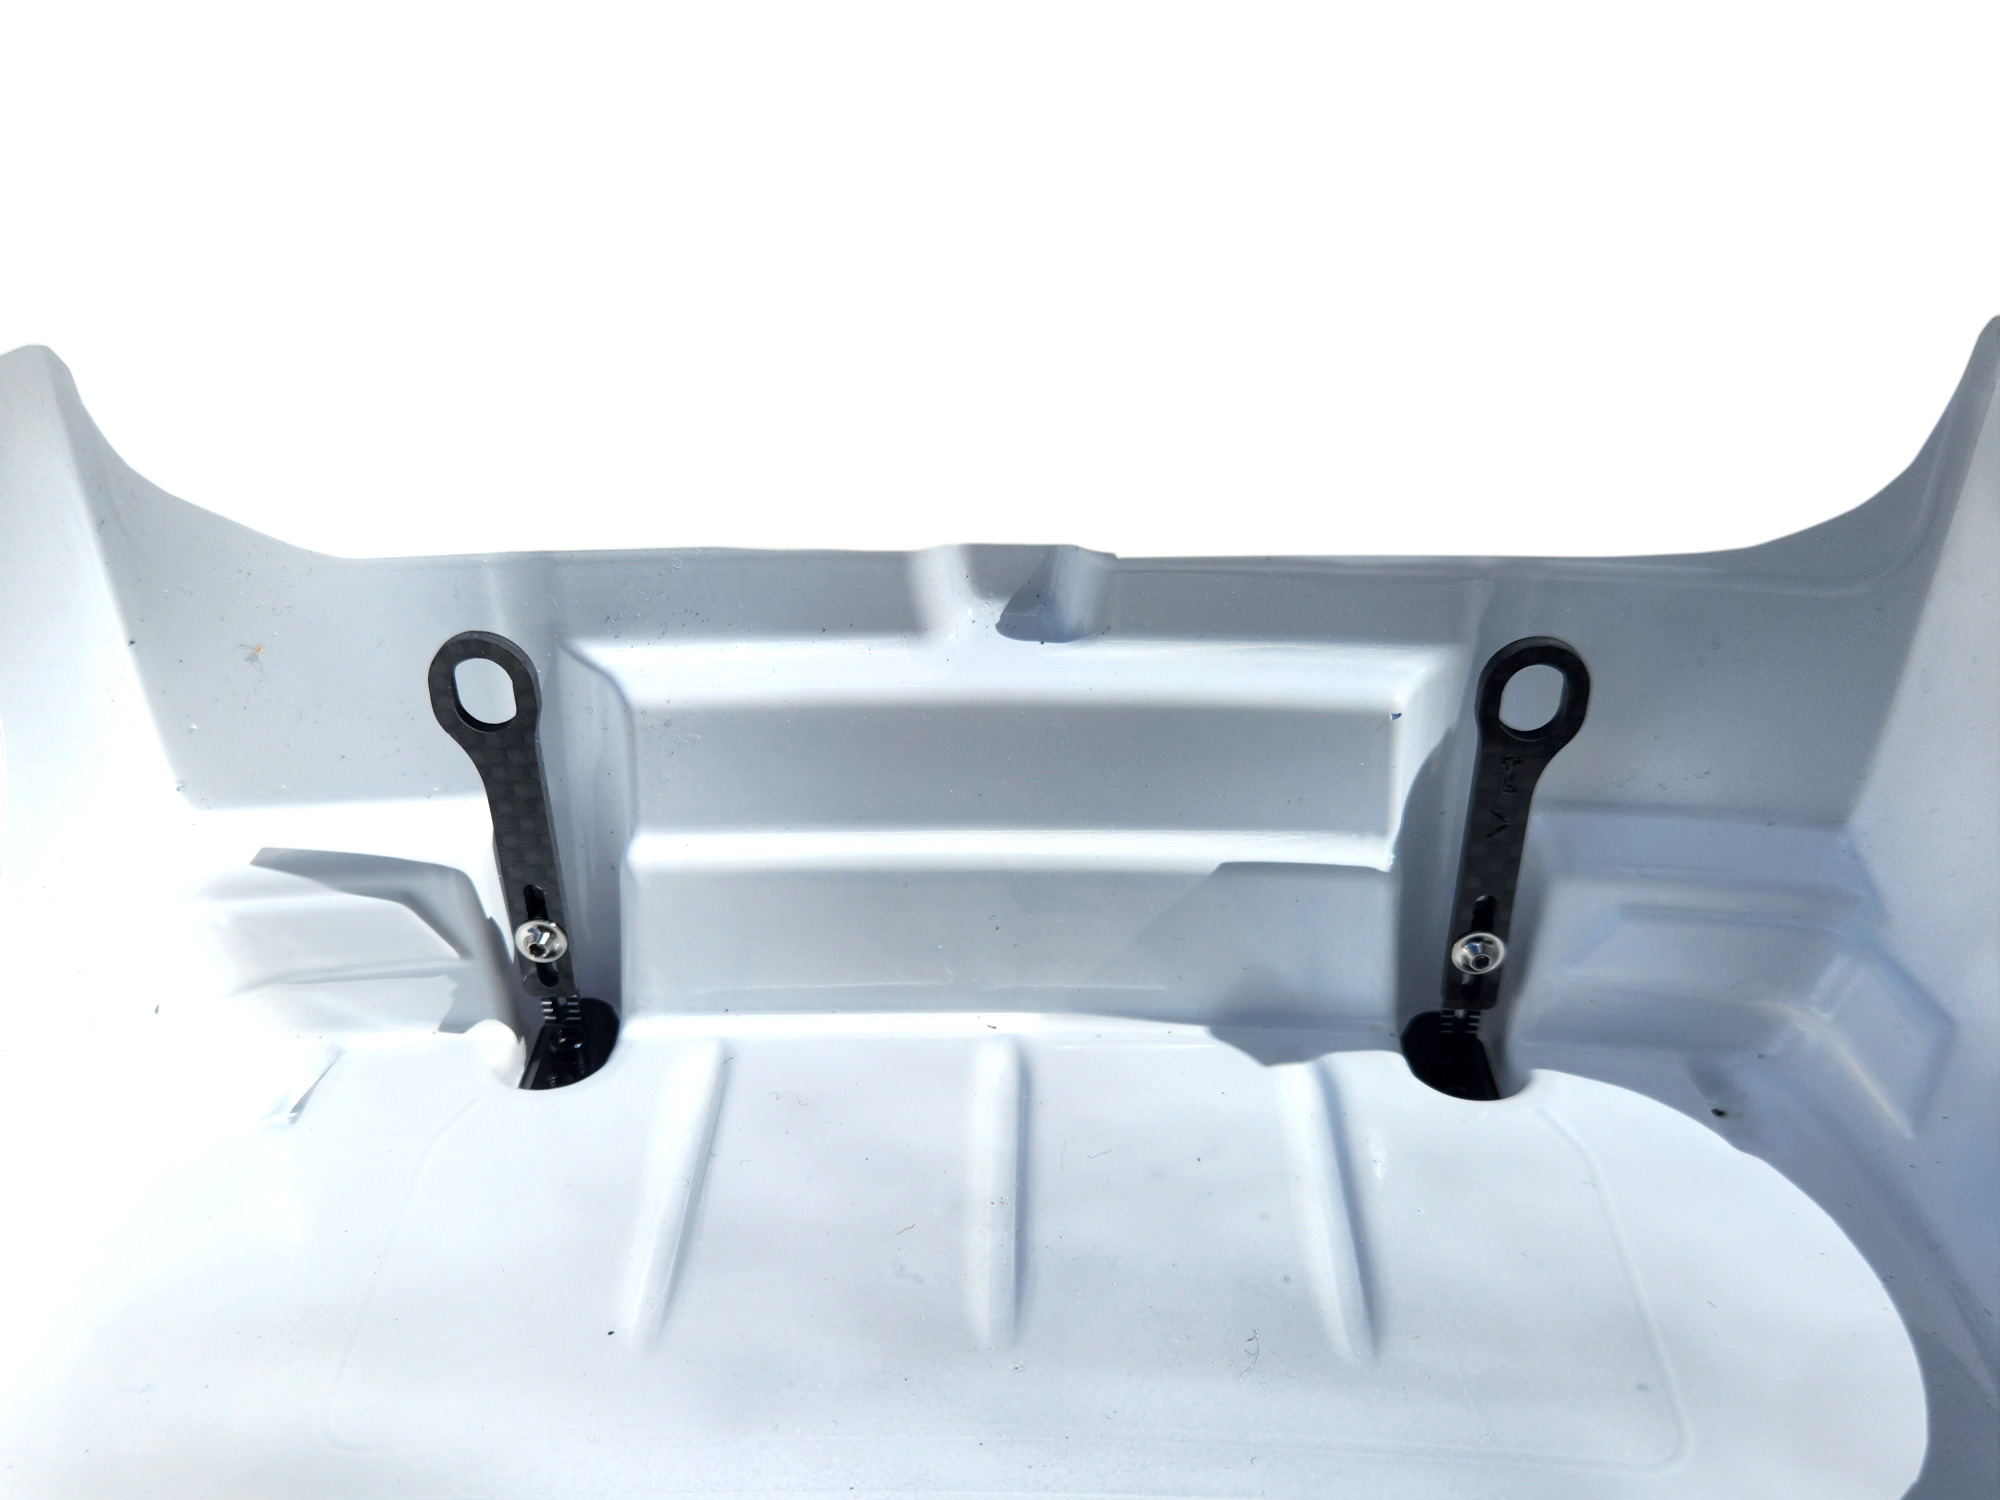


INOV8 X-Lite Horizontal Body Mount Aluminium (base part)
INOV8 X-Lite Horizontal Body Mount Aluminium (base part)
INOV8 Product description
X-Lite Horizontal Rear Body Mount for 1/10 EP Onroad
RC MAKER's original product has taken the world by storm and thousands of racers have chosen to mount their bodies the better way! After months of feedback from riders around the world as well as from our team riders, including Michal Orlowski, Marc Rheinard, Atsushi Hara, Yannic Prumper, Antoine Brunet, Akio Sobue and many more, we set out to improve an already great product even further.
Why should you use our new horizontal rear body mount X-Lite instead of the usual holes directly in the body?
Durability: The holes in Lexan are always close to the skirt, which means that they can easily be ripped out or damaged in even the smallest of accidents.
Stiffness: This area of the bodywork is very thin and can bend under load, which means that downforce is not distributed as efficiently .
Adjustability: The height adjustability of the body depends solely on the attachment to the chassis, which may not be adjustable in fine increments or easily.
Our new horizontal rear mounts improve ALL these areas!
Durability is significantly increased as there are now no holes in the rear of the body at all. The connection is made via the 2 mm thick carbon extension and the 7075 aluminium bracket, which is directly connected to the wing strut.
Stiffness is now dramatically improved by attaching the bodywork to the vehicle via a solid, extremely stiff combination of carbon fibre and 7075 aluminium. This ensures maximum downforce transfer to the rear of the vehicle and ensures that the aerodynamic potential of the body/wing is fully utilised . Use our X-Lite Touring Car Wing Buttons for maximum rigidity of your body mounting system, weighing only 0.35g each!
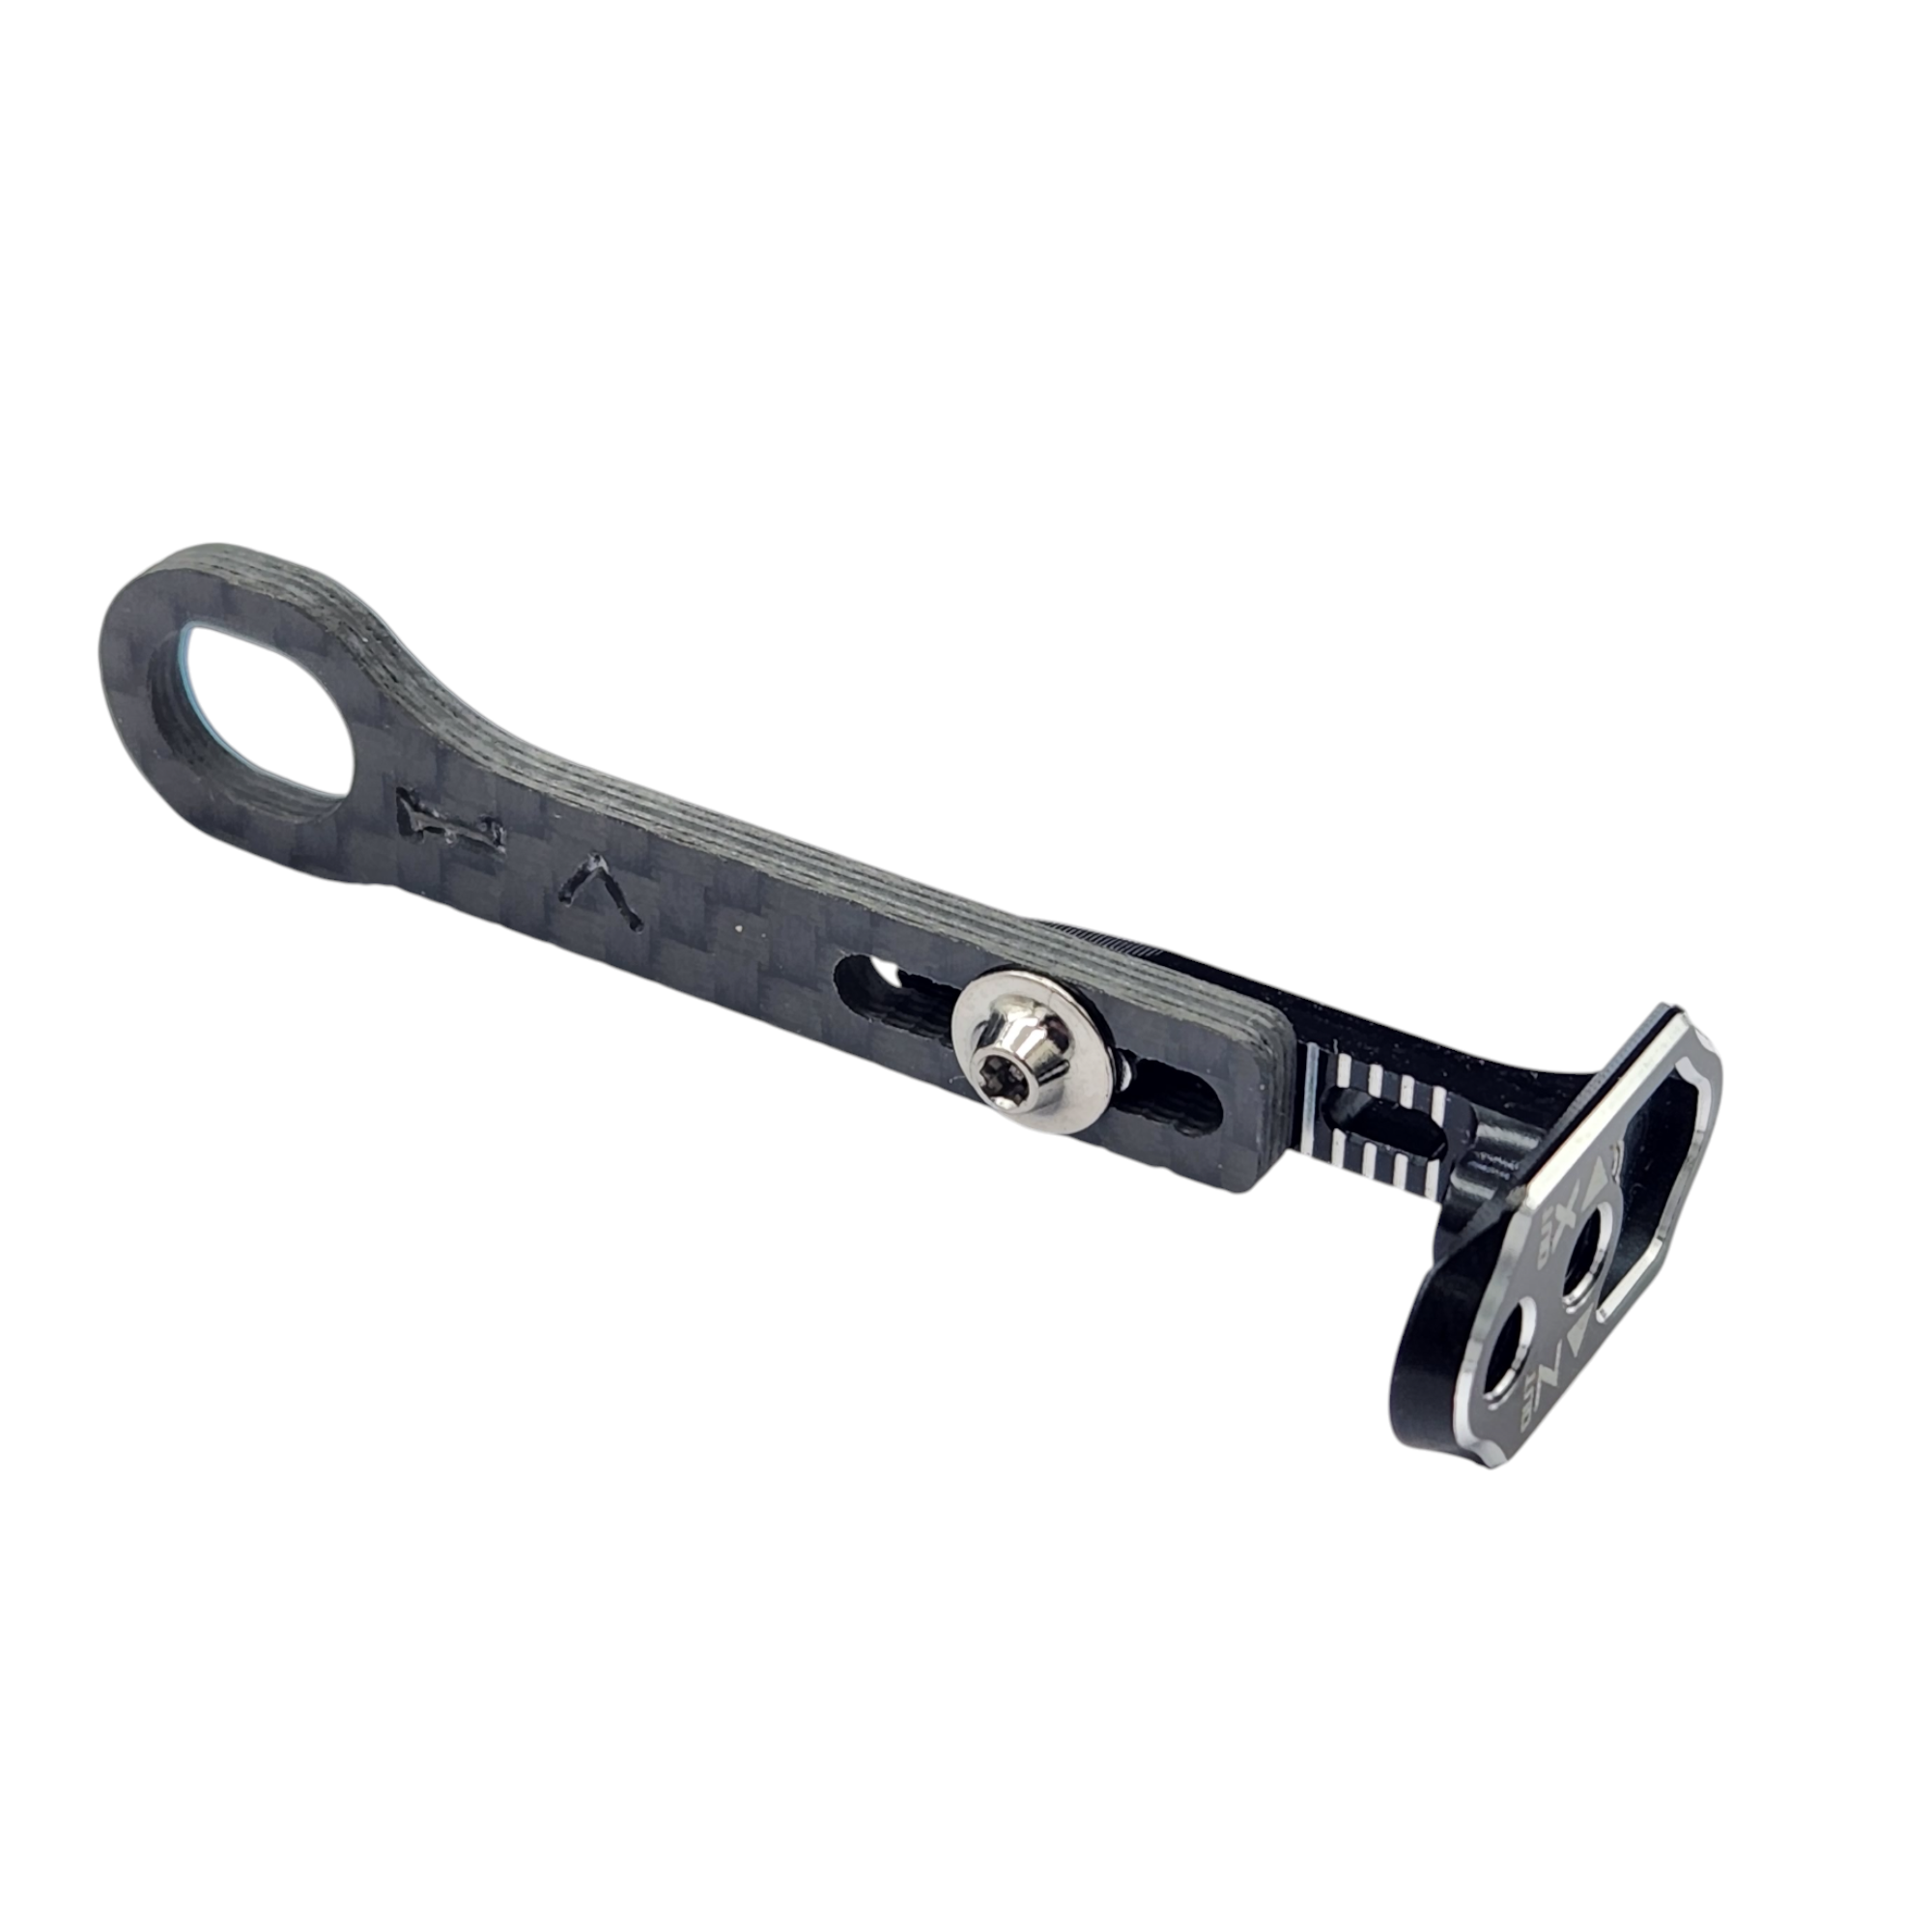
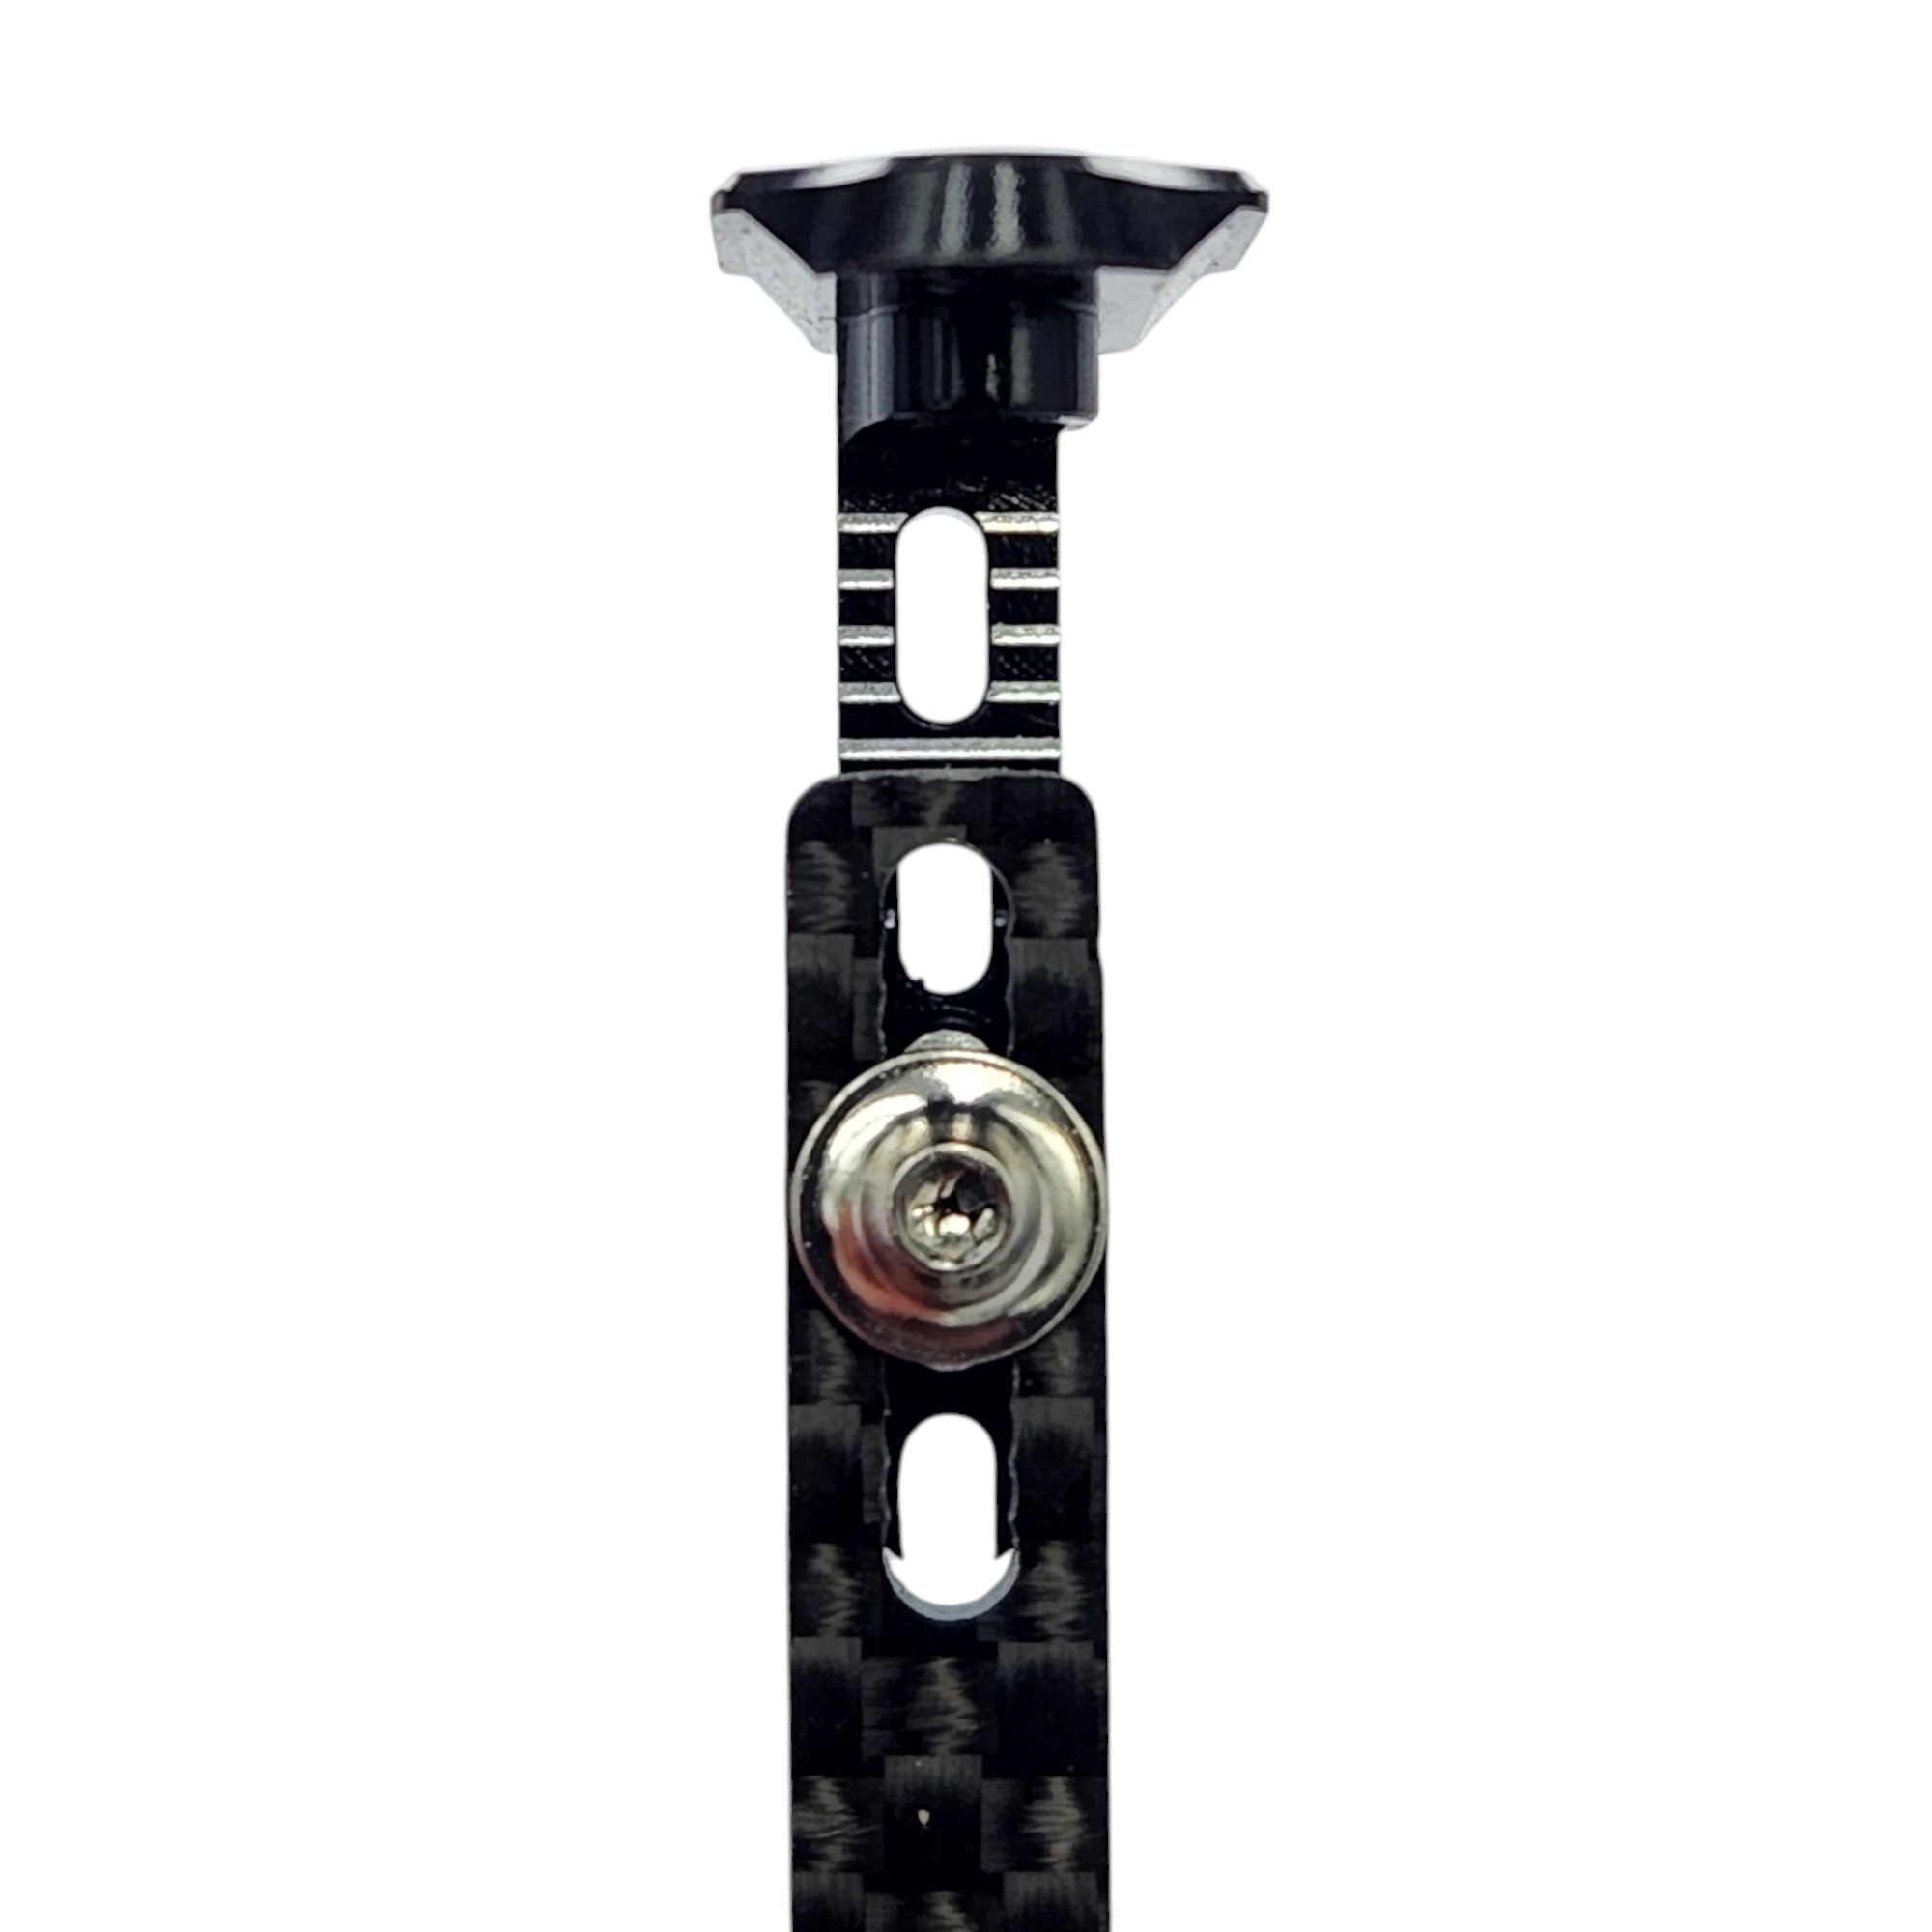
Adjustability is paramount and our HRBM can be adjusted in 1mm increments with a total travel of 7mm. Simply loosen the screws, slide the carbon extension up or down into the other notches and tighten firmly. Machined markings clearly indicate the height of the body so that it can be adjusted on the left and right.
Adjusting to different bodywork is a piece of cake. Even though different brands have different wing offsets , we have built an offset into our HRMB so that it can be rotated left and right to compensate for the different strut spacing on the bodies. This means that the same brackets and extensions can be used for all bodies and only the extensions need to be changed depending on the vehicle.
All this offers you an absolutely perfect, lightweight solution, to transfer the maximum downforce to your car and at the same time fix the body more firmly than ever to the rear of your car. The construction is very strong, so you can stay in accidents on the track and not have to replace the bodywork just because the holes have been damaged or ripped out. The adjustability of these brackets is necessary to be able to adjust the inclination and height of your bodywork.
These body mounts can be transferred from body to body and securely fasten your wing. They also support the wing strut to protect it from deformation at high speeds and in accidents.
The best part is that body mounting becomes a breeze! No more rear holes, just align the front holes correctly and bolt the brackets on! We recommend the use of body bolts on both sides of the carbon to ensure maximum rigidity.
Compatible bodies
This system fits the Xtreme Twister & Twister Speciale, all Zoo Racing bodies, LensBodies and the Protoform P63.
Compatible vehicles
Different vehicles require different extensions. See below which type of extension is required for your vehicle!
TYPE 1: A800R/RR, MTC2R, SP1, TC10/3, TRF421
TYPE 2: MS1.0, ONE.05
TYPE 3: X4'23/24, A10
TYPE 4: Mi9, XQ11 & XQ3S, RX10SR3.0R
TYPE 5: IF14-2, X20'24
TYPE 6: Mugen MTC3
The extensions must be purchased separately from the brackets !
Features:
- Optimised for maximum downforce, durability, stiffness, optics and adjustability.
- Ultra-lightweight design with a weight of only 3.7 grams per pair, including all accessories!
- Suitable for all Zoo Racing and Xtreme, LensBodies, Bittydesign Hyper HR and Blitz Roadster bodies.
- Only one carbon extension is required per vehicle, as the brackets have integrated body offsets.
- Grade 5 titanium bolts included for maximum strength and minimum weight.
- Can be integrated into our existing anti-tuck stiffeners .
- Extension versions for all common touring cars.
- No drilling required in the bodywork, therefore super easy installation.
- 7075 black anodised aluminium brackets for maximum strength and minimum weight.
- Mounting hardware included, but NO carbon extensions required for use.
Mounting instructions
ZOO RACING:
Attach the aluminium brackets to the wing struts, with the Z on each side of the body facing outwards .
Attach the carbon fibre extension to the bracket, with the offset facing outwards. Secure it in the centre position using the size 5 titanium screw supplied .
Check that the body/brackets slide onto the rear posts. If they are too tight, loosen the carbon extension slightly, move it in the desired direction and tighten it again. The body posts may also be bent. Simply bend them in the desired direction so that the body can move freely up and down on the rear posts.
Bring the rear of your body to the correct height by loosening the grade 5 screw, moving the carbon extension up or down and retightening the screw.
XTREME:
Attach the aluminium brackets to the wing struts, with the X on each side of the body facing outwards .
Attach the carbon fibre extension to the bracket with the offset facing outwards. Fasten it in the centre position using the supplied size 5 titanium screw.
Check that the body/brackets slide onto the rear posts. If they are tight, loosen the carbon extension slightly, move it in the desired direction and tighten it again. The body posts may also be bent. Simply bend them in the desired direction so that the body can move freely up and down on the rear posts.
Bring the rear of your body to the correct height by loosening the size 5 screw, moving the carbon extension up or down and retightening the screw.
| Body Shell Accessories: | Haltesysteme |
|---|


INOV8 X-Lite Horizontal Body Mount Aluminium (base part)
INOV8 X-Lite Horizontal Body Mount Aluminium (base part)
INOV8 Product description
X-Lite Horizontal Rear Body Mount for 1/10 EP Onroad
RC MAKER's original product has taken the world by storm and thousands of racers have chosen to mount their bodies the better way! After months of feedback from riders around the world as well as from our team riders, including Michal Orlowski, Marc Rheinard, Atsushi Hara, Yannic Prumper, Antoine Brunet, Akio Sobue and many more, we set out to improve an already great product even further.
Why should you use our new horizontal rear body mount X-Lite instead of the usual holes directly in the body?
Durability: The holes in Lexan are always close to the skirt, which means that they can easily be ripped out or damaged in even the smallest of accidents.
Stiffness: This area of the bodywork is very thin and can bend under load, which means that downforce is not distributed as efficiently .
Adjustability: The height adjustability of the body depends solely on the attachment to the chassis, which may not be adjustable in fine increments or easily.
Our new horizontal rear mounts improve ALL these areas!
Durability is significantly increased as there are now no holes in the rear of the body at all. The connection is made via the 2 mm thick carbon extension and the 7075 aluminium bracket, which is directly connected to the wing strut.
Stiffness is now dramatically improved by attaching the bodywork to the vehicle via a solid, extremely stiff combination of carbon fibre and 7075 aluminium. This ensures maximum downforce transfer to the rear of the vehicle and ensures that the aerodynamic potential of the body/wing is fully utilised . Use our X-Lite Touring Car Wing Buttons for maximum rigidity of your body mounting system, weighing only 0.35g each!
Adjustability is paramount and our HRBM can be adjusted in 1mm increments with a total travel of 7mm. Simply loosen the screws, slide the carbon extension up or down into the other notches and tighten firmly. Machined markings clearly indicate the height of the body so that it can be adjusted on the left and right.
Adjusting to different bodywork is a piece of cake. Even though different brands have different wing offsets , we have built an offset into our HRMB so that it can be rotated left and right to compensate for the different strut spacing on the bodies. This means that the same brackets and extensions can be used for all bodies and only the extensions need to be changed depending on the vehicle.
All this offers you an absolutely perfect, lightweight solution, to transfer the maximum downforce to your car and at the same time fix the body more firmly than ever to the rear of your car. The construction is very strong, so you can stay in accidents on the track and not have to replace the bodywork just because the holes have been damaged or ripped out. The adjustability of these brackets is necessary to be able to adjust the inclination and height of your bodywork.
These body mounts can be transferred from body to body and securely fasten your wing. They also support the wing strut to protect it from deformation at high speeds and in accidents.
The best part is that body mounting becomes a breeze! No more rear holes, just align the front holes correctly and bolt the brackets on! We recommend the use of body bolts on both sides of the carbon to ensure maximum rigidity.
Compatible bodies
This system fits the Xtreme Twister & Twister Speciale, all Zoo Racing bodies, LensBodies and the Protoform P63.
Compatible vehicles
Different vehicles require different extensions. See below which type of extension is required for your vehicle!
TYPE 1: A800R/RR, MTC2R, SP1, TC10/3, TRF421
TYPE 2: MS1.0, ONE.05
TYPE 3: X4'23/24, A10
TYPE 4: Mi9, XQ11 & XQ3S, RX10SR3.0R
TYPE 5: IF14-2, X20'24
TYPE 6: Mugen MTC3
The extensions must be purchased separately from the brackets !
Features:
- Optimised for maximum downforce, durability, stiffness, optics and adjustability.
- Ultra-lightweight design with a weight of only 3.7 grams per pair, including all accessories!
- Suitable for all Zoo Racing and Xtreme, LensBodies, Bittydesign Hyper HR and Blitz Roadster bodies.
- Only one carbon extension is required per vehicle, as the brackets have integrated body offsets.
- Grade 5 titanium bolts included for maximum strength and minimum weight.
- Can be integrated into our existing anti-tuck stiffeners .
- Extension versions for all common touring cars.
- No drilling required in the bodywork, therefore super easy installation.
- 7075 black anodised aluminium brackets for maximum strength and minimum weight.
- Mounting hardware included, but NO carbon extensions required for use.
Mounting instructions
ZOO RACING:
Attach the aluminium brackets to the wing struts, with the Z on each side of the body facing outwards .
Attach the carbon fibre extension to the bracket, with the offset facing outwards. Secure it in the centre position using the size 5 titanium screw supplied .
Check that the body/brackets slide onto the rear posts. If they are too tight, loosen the carbon extension slightly, move it in the desired direction and tighten it again. The body posts may also be bent. Simply bend them in the desired direction so that the body can move freely up and down on the rear posts.
Bring the rear of your body to the correct height by loosening the grade 5 screw, moving the carbon extension up or down and retightening the screw.
XTREME:
Attach the aluminium brackets to the wing struts, with the X on each side of the body facing outwards .
Attach the carbon fibre extension to the bracket with the offset facing outwards. Fasten it in the centre position using the supplied size 5 titanium screw.
Check that the body/brackets slide onto the rear posts. If they are tight, loosen the carbon extension slightly, move it in the desired direction and tighten it again. The body posts may also be bent. Simply bend them in the desired direction so that the body can move freely up and down on the rear posts.
Bring the rear of your body to the correct height by loosening the size 5 screw, moving the carbon extension up or down and retightening the screw.
| Body Shell Accessories: | Haltesysteme |
|---|
| Body Shell Accessories: | Haltesysteme |
|---|


