


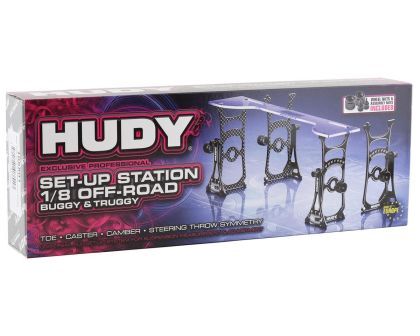

Hudy Universal Set-up System for 1:8 Off-Road Cars
- Product number: HU-108801
This aluminum setup system from HUDY is specially designed for 1:8 offroad and 1:8 electric GT on-road vehicles. It allows you to precisely adjust the front and rear axles of these vehicles and perfectly read the camber, toe and caster. Precise adjustment of the steering angle is also child's play. Such a system is a MUST for all ambitious racing drivers. The Hudy system is known for its absolute precision.
Scope of delivery:
- 4 x setup indicators for the entire vehicle
- 1 x Plexiglas plate for reading the track
- Nuts and bolts for mounting the system
- Cardboard box for storage
How a setup system works on a 1:10 RC car
For ambitious drivers in RC model making , a precisely tuned vehicle is the key to success. A setup system helps to precisely measure and adjust chassis parameters - for better performance on the track. Here we explain how to use a setup system correctly on a remote-controlled 1:10 RC car .
What is a setup system?
A setup system is a special measuring tool that is used for wheel alignment of an RC car. It usually consists of measuring plates, measuring rulers and angle indicators, which are mounted in place of the wheels. This allows important parameters such as:
-
Toe (Toe-In/Toe-Out)
-
Camber
-
Caster
-
Steering angle (Ackermann)
precisely measured and adjusted.
Step-by-step instructions: Using the setup system
1. Prepare the vehicle
-
Remove the tires
-
Ensure that all suspension components can move freely
-
Position the vehicle on a flat surface
2. Fit the setup system
-
Attach the setup plates to the steering knuckles or wheel carriers (instead of the wheels)
-
Ensure that the plates are secure and straight
3. Measure the wheel alignment
-
Use the measuring scales to read the difference between the front and rear edges of the setup plates
-
Use the track rods to precisely set the Toe-In (toe-in) or Toe-Out (toe-out)
4. Check the camber
-
Use the integrated camber gauge on the setup plates
-
Set negative or positive camber depending on the track requirements (usually: -1° to -3°)
5. Adjust caster and steering
-
Check the caster angle with the help of special caster tools or using the setup data
-
Check Ackermann (steering geometry) and adjust if necessary
6. Double check
-
Measure again after each adjustment
-
Adjust the setup symmetrically on both sides
7. Document the setup
-
Record all values in writing (setup sheet)
-
This makes it easy to reproduce setups for different routes or conditions
Why is a setup system so important?
A precisely adjusted chassis ensures
-
More driving stability
-
Better cornering behavior
-
Even tire wear
-
Predictable performance on different track surfaces
Especially inthe competition area of the 1:10 RC-Car Sports (e.g. touring cars or buggy class), a good setup is the difference between victory and defeat.
Tip: Check regularly
Even after crashes or intensive use, it is advisable to re-measure the vehicle with the setup system. The smallest deviations can significantly change the driving behavior.
| Setup Tools: | Setup System |
Ergänzende Informationen / Additional information
Verantwortlicher / Responsible
SMI Modell-Vertriebs GmbH
Gärtnerstraße 2, 57076 Siegen
GER
http://www.smi-motorsport.de/
info@smi-motorsport.de
Hersteller / Manufacturer
HUDY
K Vystavisku 6992, 911 01 Trencin
SK
https://www.hudy.net/
info@hudy.net
 | ACHTUNG: Nicht für Kinder unter 36 Monaten geeignet wegen verschluckbarer Kleinteile, Erstickungsgefahr. CAUTION: Not suitable for children under 36 months due to small parts that can be swallowed, choking hazard. |
| ACHTUNG: Nicht für Kinder unter 14 Jahren geeignet. Benutzung unter unmittelbarer Aufsicht von Erwachsenen. CAUTION: Not suitable for children under 14 years of age. Use under the direct supervision of adults. |
Sicherheitshinweise GHS / H-Sätze | Safety instructions / Hazard Statements
- H 315: Verursacht Hautreizungen (Causes skin irritation)
- H 319: Verursacht schwere Augenreizung (Causes severe eye irritation)
- H 335: Kann die Atemwege reizen (May irritate the respiratory tract)
Sicherheitshinweise GHS / P-Sätze | Safety instructions / Precautionary Statements
- P 102: Darf nicht in die Hände von Kindern gelangen. (Keep out of the reach of children.)
- P 261: Einatmen von Staub / Rauch / Gas / Nebel / Dampf / Aerosol vermeiden. (Avoid inhalation of dust / smoke / gas / mist / vapour / aerosol.)
- P 271: Nur im Freien oder in gut belüfteten Räumen verwenden. (Only use outdoors or in well-ventilated rooms.)
- P 280: Schutzhandschuhe / Schutzkleidung / Augenschutz / Gesichtsschutz tragen. (Wear protective gloves / protective clothing / eye protection / face protection.)
- P 305+351+338: Bei Kontakt mit den Augen: Einige Minuten lang behutsam mit Wasser spülen. Vorhandene Kontaktlinsen nach Möglichkeit entfernen. Weiter spülen (In case of contact with eyes: Rinse cautiously with water for several minutes. Remove any contact lenses if possible. Continue rinsing)
- P 312: Bei Unwohlsein Giftinformationszentrum oder Arzt anrufen. (If you feel unwell, call a poison information centre or doctor.)
- P 405: Unter Verschluss aufbewahren. (Store under lock and key.)
- P 501: Inhalt/Behälter … zuführen. (Feed contents/container ....)
Sicherheitshinweise / EUH | Safety instructions / EUH
- EUH 202: Cyanacrylat. Gefahr. Klebt innerhalb von Sekunden Haut und Augenlider zusammen. Darf nicht in die Hände von Kindern gelangen. ()